
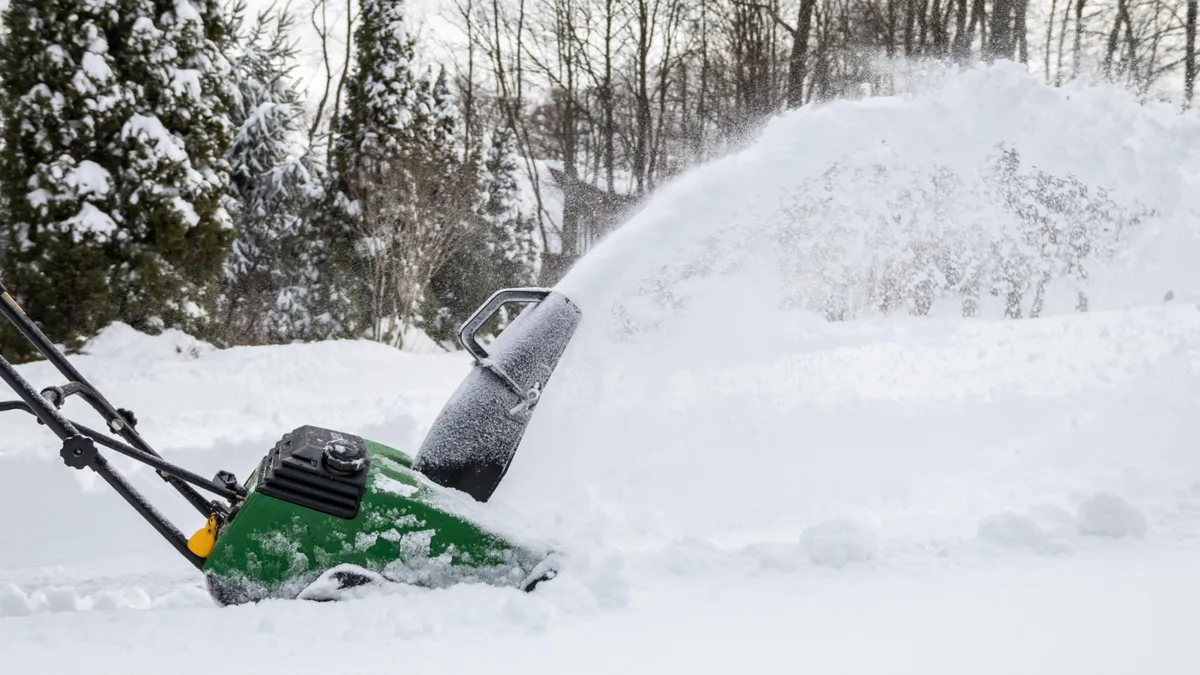
The best snow blowers can turn back-breaking manual snow removal into one that is quick and easy, and of course, much easier on your back. In some parts of the country, snow removal is a daily, or semi-daily task that needs to be completed during the winter. Without it, ice can form beneath the snow making it dangerous to walk and drive outside. Cars can even get stuck in homeowners own driveways with too much snow and ice piled up. And trust us, if you’re needing to remove snow that often, you don’t want to do it with a shovel and sweat equity. A snow blower is a must-have homeowner item.
- Snow Blower. This can either be a single-stage (snow thrower) or a two-stage snow blower. Single stage snow blowers can be battery powered, electrical (corded), or gas powered. Two-stage snow blowers are almost always exclusively gas powered.
- Gas. If you have a gas powered snow blower, you’ll need fuel to operate the machine.
- Oil. Again, if you have a gas-powered engine, you’ll also need oil to operate the machine.
- Goggles (Amazon). It’s always smart to wear safety gear. If you stand out of the way of the chute, you should never have to worry much about anything being hurled towards you, but it is still safe to wear goggles.
- Ear plugs (Amazon). Engines are loud, so protecting your hearing with ear plugs or ear protectors is a smart move.
- Chute cleaner (Amazon). You should never use your hand to clean the chute or the auger. Use a chute cleaner, or even a stick to remove snow and ice from the chute or auger.
In some states, such as where I live in Utah, snow removal from your property is required by law. Salt Lake City, for example, requires the resident to remove snow within 24 hours after a storm. Failing to do so may result in fines, and the resident being held liable for a slip-and-fall accident. At the most basic level, snow removal is simply a good neighborly thing to do. It makes walkways safer and keeps the property looking maintained.
But if you’ve never operated a snow blower before, the idea of operating a new machine may be intimidating. First off, there are many snow blowers to choose from and finding the right one for your regional climate is essential. We have a helpful guide on snow blowers vs snow throwers that can help you find the right amount of snow blowing power for your needs.
Once you’ve found a snow blower, knowing how to properly use it will save you much time and effort during the snow removal task, year-after-year. We’re here to help you along the way, and ensure that you feel confident and safe when using your snow blower.
Quick steps: How to use a snow blower
- If applicable, ensure there is gas in the snow blower
- If using a gas snow blower, set the engine to “choke,” prime the engine (once or twice), and pull the cord. After the engine starts, move the engine from the choke position to the open position (run).
- For clearing a driveway, walk the length of the driveway, not perpendicular. Also, start in the center of the driveway and work in a “circle.”
- If the machine gets clogged, turn off machine, wait a few seconds, then use a chute cleaner to remove clog.
- After the job is complete, let the blower run for a moment on low throttle to cool down before turning off. Use a brush or leaf blower to remove any remaining snow on the body off the snow blower.
- Store the snow blower.
Step by step guide: How to use a snow blower
1. Remove objects

It’s always smart to check for anything that may have been left in the driveway or sidewalk before you start. You don’t want to accidentally suck one of your children’s or dog’s toys into the auger. If possible, remove any large rocks or sticks from the clearing area as well.
2. Starting your gas snow blower

If you have a battery-powered snow blower, simply press and hold the safety button and pull the lever.
For a gas powered motor, make sure there is gas and oil in the engine (follow the manual specifications on the type of oil and gas). Set the engine to “choke” and prime the engine once or twice, and pull the cord to start the engine.
Once the engine is running, turn the choke off and put the engine in the run or open position. If your snow blower has a throttle (self propelled), move it into the forward position.
3. Start from the middle

It might seem counterintuitive to make a pass down the center of your driveway first, but it is going to save you a lot of time in the long run. You are going to work in an inside-out, circular pattern.
Make your first pass down the center of the driveway with your chute facing towards your yard. At the end, make your turn and start to go back up. Your next pass you will turn in the same direction as you did at the end of your first pass.
Working this way eliminates the need to stop and adjust the direction of the chute. By working in this circular walking pattern, starting from the middle and working out, you’ll clear your area much quicker than starting on one side and working your way to the other side of your driveway.
4. Clearing the chute

It is inevitable that snow is going to get packed and clog up the chute. To unclog the chute, turn power off to the motor.
Do not clear the chute with the motor running. According to the Consumer Product Safety Commision, over 5,000 injuries happen a year due to snow blower related accidents. Use the chute clearing device that comes with your snow blower, or a stick or a broom handle to remove packed snow.
5. Turning the snow blower off

After you’ve successfully cleared your driveway and walkways, turn the throttle down for 30 or 60 seconds to let the engine cool down. After that time, you can turn the engine off. Remove any excess snow on the body of the snow blower with a brush or leaf blower.
6. Storing the snow blower

If your garage or wherever you store your snow blower remains at freezing temperatures, you’ll want to remove snow from the augers. You don’t want to do this with your hands. Instead, wheel your snow blower onto a rubber mat, and use a space heater to melt the snow. About 15-20 minutes should do the trick.
Pro Tip: After your snow blower is completely dry, spray the mouth of the snow blower and the chute with Silicone Spray. This will create a mild moisture barrier and keep snow from sticking during use. Keep the snow blower in a garage, or keep it covered and dry with a tarp or cover the best you can.
Learn more about proper snow blower maintenance in our article on how to clean your snow blower.
How to use a snow blower: FAQs
What should you not do with a snow blower?
- Never leave the snow blower running unattended
- Never put your hands in the chute or in the mouth with the auger
- Never put your snow blower away while it is still packed with snow
- Don’t use over gravel driveway or walkways
Is it ok to leave a snow blower outside?
Yes, but you want to ensure the machine is completely dry and covered after use. Leaving your machine outside and not covered may result in corrosion and rusting of the components and mechanical issues down the road.
Should you dry off a snow blower after each use?
Yes. Leaving water on the machine can lead to rust and corrosion. It can also freeze if the weather is cold enough. If the impeller or augers are frozen and you turn the machine on, it can lead to damaged drive belts.
Final thoughts
A snow blower is a great tool to make quick work of removing snow. Remember before you start to remove any objects from the area you are clearing. If the motor is cold, use the choke to start the engine and move it to run once it has started.
The most efficient way to remove snow from a driveway is to work in an inside-out, circular motion down the length of the driveway. And when you’re done, let the motor cool off before you shut it down, and be sure to remove any excess snow before storing. These tips will help you remove snow from your property in the fastest and most efficient way, while also keeping your snow blower well maintained and ready whenever you need it.

