Luminar AI is something of sideways step for the series. Prolific developer Skylum began integrating AI elements into its image editing applications a few releases ago, and 2019’s Luminar 4 had some extremely cool tools, especially its ability to seamlessly replace the sky in a photo with something more dramatic. New release Luminar AI doubles down on these AI tools but strips out a lot of the traditional editing, acting as a companion app to Luminar 4 rather than a straight replacement. Like the previous apps, it can also be used as a plugin for Lightroom Classic, Photoshop CC, and macOS’s Photos app. But let's take nothing away from Luminar AI - it's still one of the best photo editing apps out there.
The user interface is typical for a Luminar app. If you’ve used one before you’ll be at home, but those coming from any other applications may discover that things are done a little differently around here. The buttons are spread around the interface, and Skylum still hasn’t implemented tooltips, so if you hover the mouse pointer over an unfamiliar button you get... nothing. There’s nothing to do but press it and see. Luckily, there’s always an undo button within reach, and Luminar AI is less populated with apparently random buttons than Luminar 4 was.

The best of Luminar 4’s interface persists, however. The buttons that open a side-by-side view, with a movable before-and-after vertical terminator that can be dragged from side to side to show the original image on one side and the edited version on the other. The Eye button, that just shows you the original while you hold it down, is still there too. Skylum still hasn’t been able to implement a horizontal division, however.
Otherwise, the new interface is a simpler one than before. You get a zoom percentage, a question mark button that opens a browser window and takes you to Luminar’s video tutorial and, right in the bottom right corner, a clock face that opens a History palette, allowing you to step back through the edits you made to the current image. Menus such as File and Edit are accessed by clicking the Luminar logo in the top left, meaning that all the non-editing interface really consists of are the workflow buttons along the top.
The first of these, the + button, allows you to add a folder of images, or a single image, to the app catalog. Once it has imported your images, you can select one for editing, and any new images added to the folder will be imported. Luminar is a non-destructive image editing app, which means your original files aren’t overwritten as you edit. The edits are stored in a database file, and only permanently applied when you export a new version of the image when you’re happy with your changes.
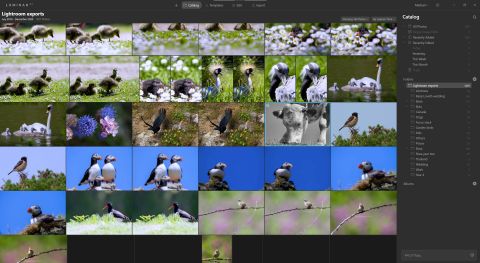
Progressing to the next button along brings us to the catalog itself, where all your images are stored. You can skip between folders, view images that have been recently added or recently edited, and delete those you don’t want, but there doesn’t seem to be any way to change the size of the thumbnails. Right-clicking an image brings up a useful menu from which you can search for images taken at the same time, set ratings, and add groups of images to albums. Double-clicking an image opens it full-screen, with a filmstrip of images along the bottom of the screen allowing you to skip between them. It works a lot like Adobe Lightroom in this mode, although its organisational abilities aren’t as strong, and it can’t import images directly from a memory card.

Templates is the next step, which replaces the right-hand organization tools with a series of one-shot filters that Luminar 4 called Looks. Along with the name-change, their implementation here is much better, with an analysis of your image bringing up the sort of looks that might complement it best. It recognises landscapes, animal photos and portraits, suggesting a variety of treatments, usually including at least one monochrome one.
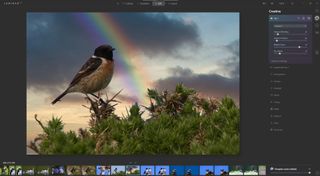
The Edit section is where the majority of the AI tools are to be found. The Composition AI attempts to crop the image in a pleasing way, although we found it too keen to chop off the edges - it’s best used with an image that has a lot of space around the subject. There are other tools that affect the structure of the image, allowing you to transform it in 3D space. Erase removes an object from the image in the same way as Photoshop’s healing brush, while Enhance AI and Structure AI let you boost the colours and sharpness of your photo and work very well. There’s an AI sky enhancer too, for boosting the skies that naturally appear in the image. You can safe the effect of any tool down, meaning it’s possible to turn a sledgehammer of an effect into something more subtle.
Further down in the Creative section is the Sky AI, which replaces the sky with one from its catalog or that you supply yourself. It cleverly relights the scene to match the new sky, and is one of Luminar’s very best features. New is the ability to add images, such as hot air balloons and even the space shuttle, to the sky with Augmented Sky AI. This is a total gimmick, but the objects are nicely blended with the original image. It’s also quite a lot of fun.
Mist, haze and fog can be added with Atmosphere AI, before the AI tools run out and you’re left with photographic staples such as film grain and soft focus effects.

Should you use Luminar AI?
As a standalone app, you’ll quickly run out of things to do with Luminar AI, but as part of an editing workflow, teamed with one or more of the top image editing apps - like Photoshop or CyberLink PhotoDirector 12 - it can really shine, especially of you want to insert some humor into your images.

