How to print from Google Docs
We break down how to print from Google Docs in just a few clicks.

Google Docs is an online word processor included for free as part of the web-based Google Docs Editors suite and is an alternative to Microsoft Word, alongside Google’s Sheets which is a free alternative to Microsoft Excel.
As a piece of free software it’s no surprise that it’s grown in popularity over the years with many people using it at home or in the office for basic word processing, writing work, letters and articles. Here we show you how to print out your work from Google Docs using the best compact printers or the best all-in-one printers and examine all of the different options and features available in the printing dialogue.
How to print from Google Docs
Step 1
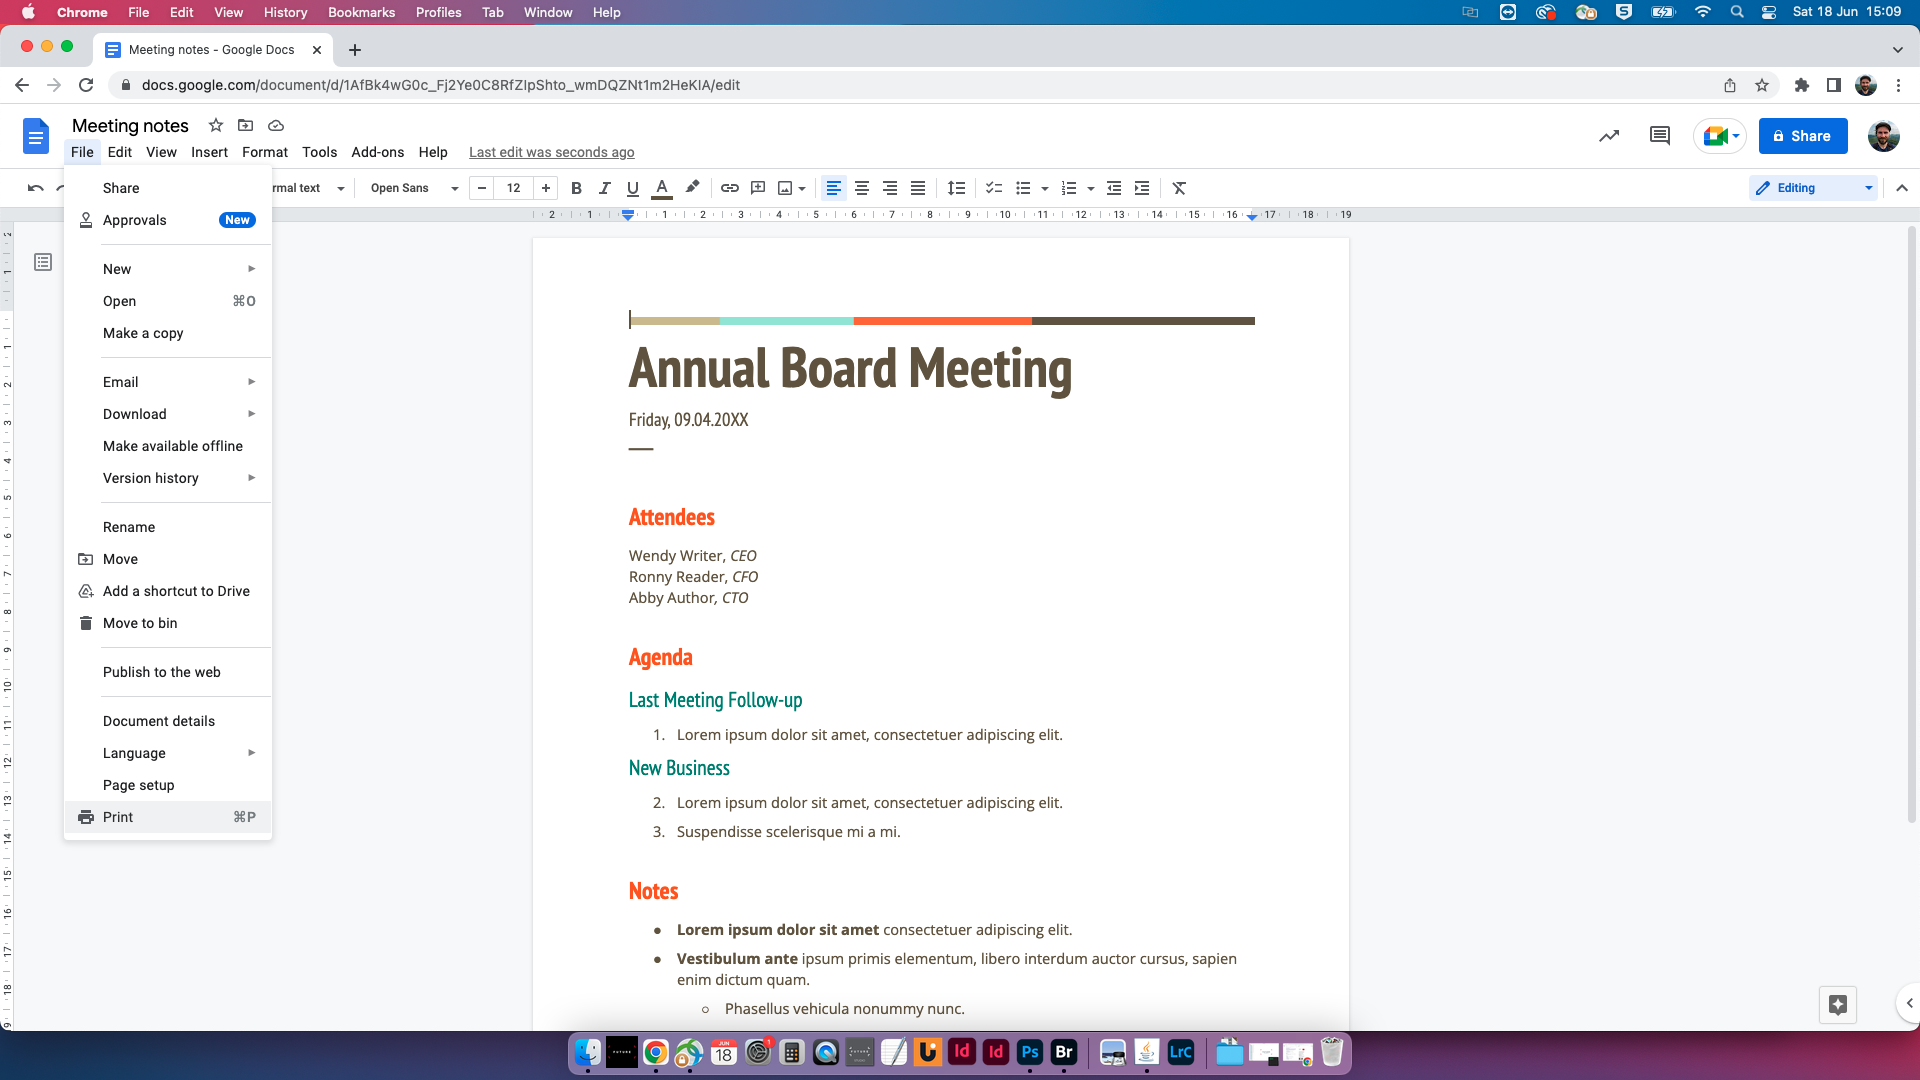
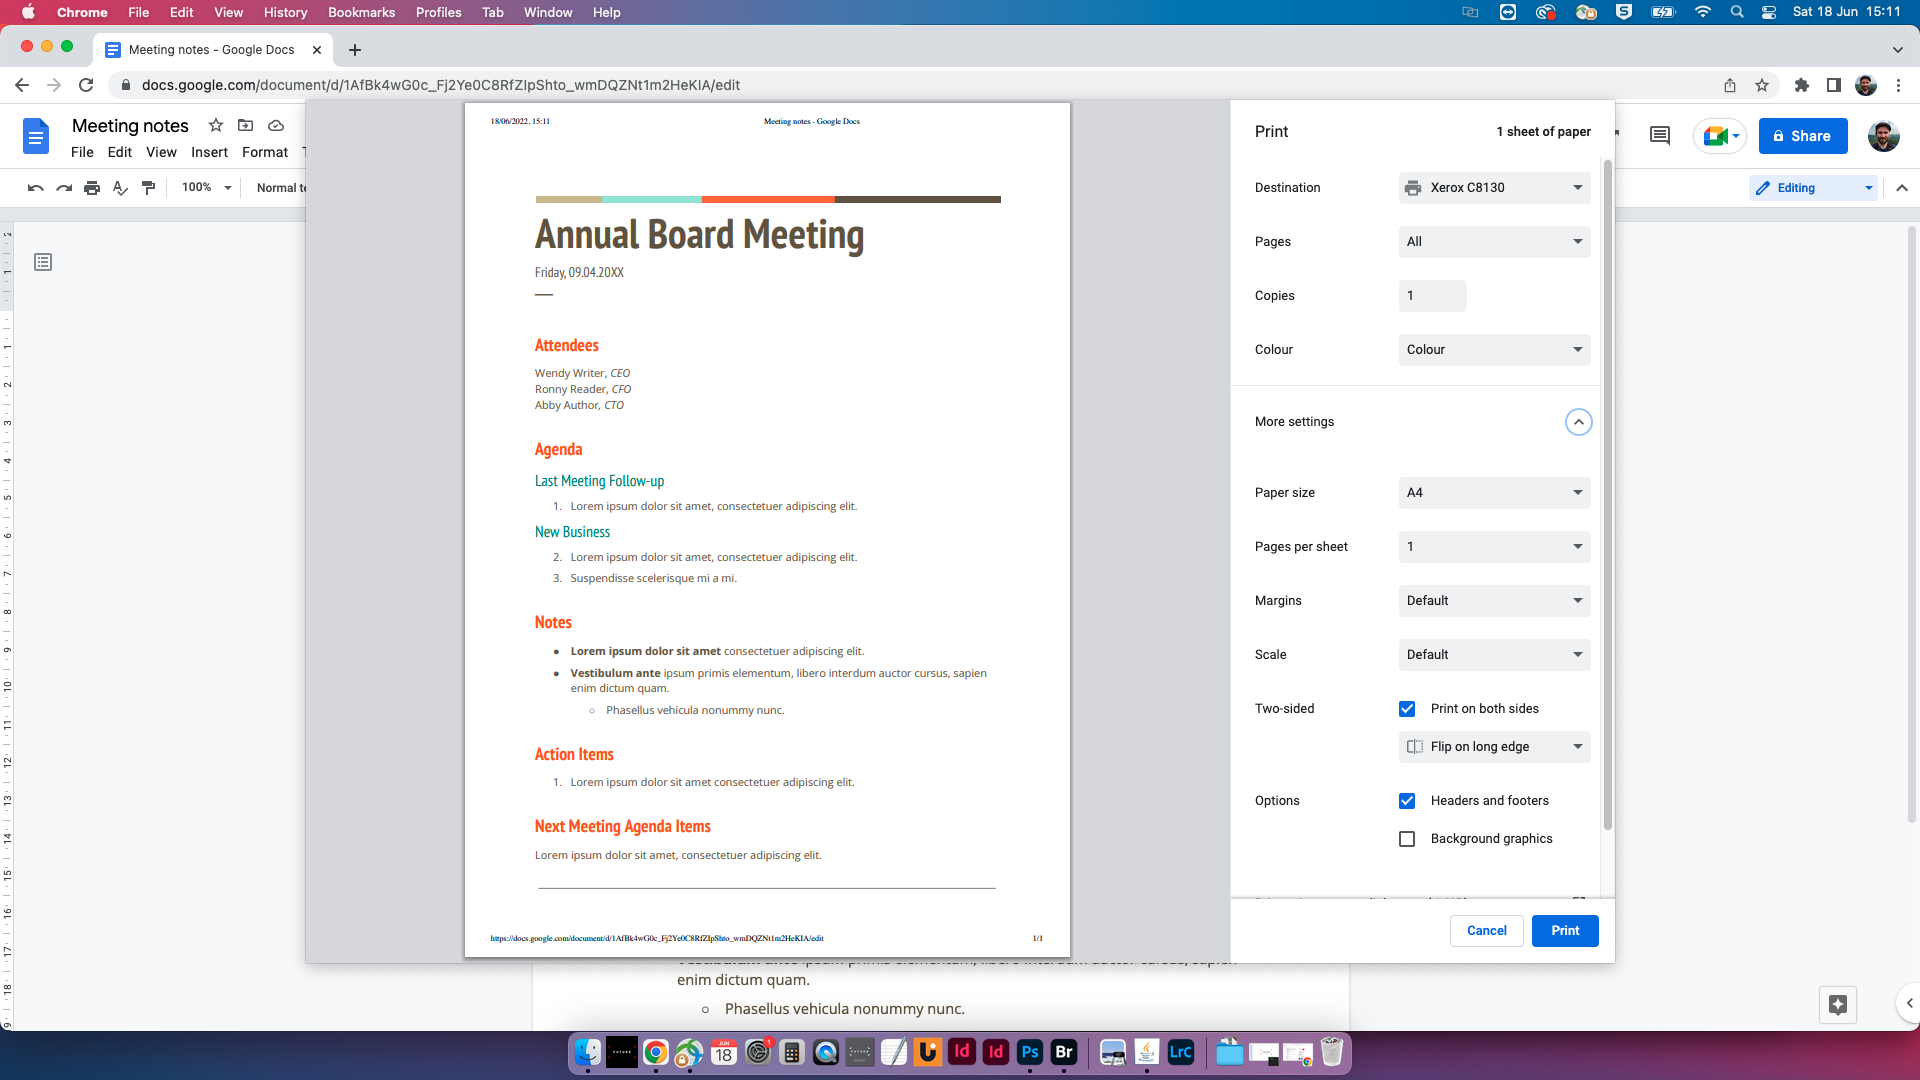
Go to File>Print or hit the shortcut Ctrl+P (Windows) or Cmd+P on Mac to bring up the print menu. Under destination you’ll want to click the drop-down menu and make sure your desired printer is selected. If your printer does not appear be sure to run through troubleshooting options, such as turning it off and on, making sure your computer is connected to it via WiFi or Bluetooth, or plugged in by a cable if it’s an older model, you should then see it appear in the list and you’ll be able to select it.
Step 2
Next you have the Pages option. By default, this will be set to print all of the pages in your document but if you only want a select number of pages to be printed to save on paper and waste then change this to Customized and enter your pages making sure to leave a comma followed by a space for each such as 1, 3, 5. You can also print a range of pages by adding a hyphen between the first and last page of your desired printing range such as 1-5, or combine the too so this could for example look like 1-5, 8, 11-13 and so on.
Step 3
Sign up to receive the latest news, reviews, buying guides and deals direct to your inbox
Then you have options for the number of copies you wish to print and also a Color option so you can choose to print in Color or Black and White to save on color inks.
Step 4
Click the More settings drop down button to reveal more options. Here you can set the Paper Size, most standard documents are going to be printed at A4 on home office printers but you can change this setting here if you need to, such as for printing on Envelopes or at A3.
You can also set Pages per Sheet, Margins and Scale though these can generally be left to their default values for everyday printing.
If you’d like to print on both sides of the paper to cut down on paper waste ensure the Print on both sides option is checked under Two-sided, then choose whether you want to Flip on the long edge so the text reads the same way up on both sides of the paper like a book or magazine, or flip on short edge to invert it.
Discover more guides for the home office…
Best home computer
Best photo printers
Best keyboards for home office
Best touch screen monitors
Best smart pens
Dan is Technique Editor on PhotoPlus: The Canon Magazine magazine. With over a decade writing about all things tech he’s written for a variety of publications before joining Future in April 2019 in that time working across Top Ten Reviews, Digital Camera World, PhotoPlus, NPhoto, Digital Camera and Digital Photographer.


