How to print on Mac
Learn how to print on Mac to bring your documents and photos to a physical form.
Sign up to receive the latest news, reviews, buying guides and deals direct to your inbox
You are now subscribed
Your newsletter sign-up was successful
Whether you use a Macbook Pro or Air laptop, a desktop iMac, Mac Pro or a Mac Mini you’ll likely need to know how to print on Mac at some stage.
Depending on the type of document that you wish to print, your Mac will give you different options. While the end result may be the same, you may prefer the interface of certain programs. For example you could open a PDF into Apple’s proprietary Preview, or Adobe Acrobat Reader, or Adobe Photoshop CC (amongst many other programs) and each of these will have a different feel and their own options.
Double-clicking an image or PDF will likely open it into Preview by default, while text documents may open instead into TextEdit, Pages or Microsoft Office if you have it installed. Right-click on the thumbnail of any document or image and choose Open With, then choose your desired program to open it into. No matter whether you use one of the best compact printers or the best all in one printers, the steps will be the same.
We’re going to show you how to print with Apple’s proprietary Preview program because it comes pre-installed on your Mac, though many of the options will be very similar in other programs like Adobe Photoshop CC, Google Docs or Office 365.
How to print with Apple Preview
Step 1
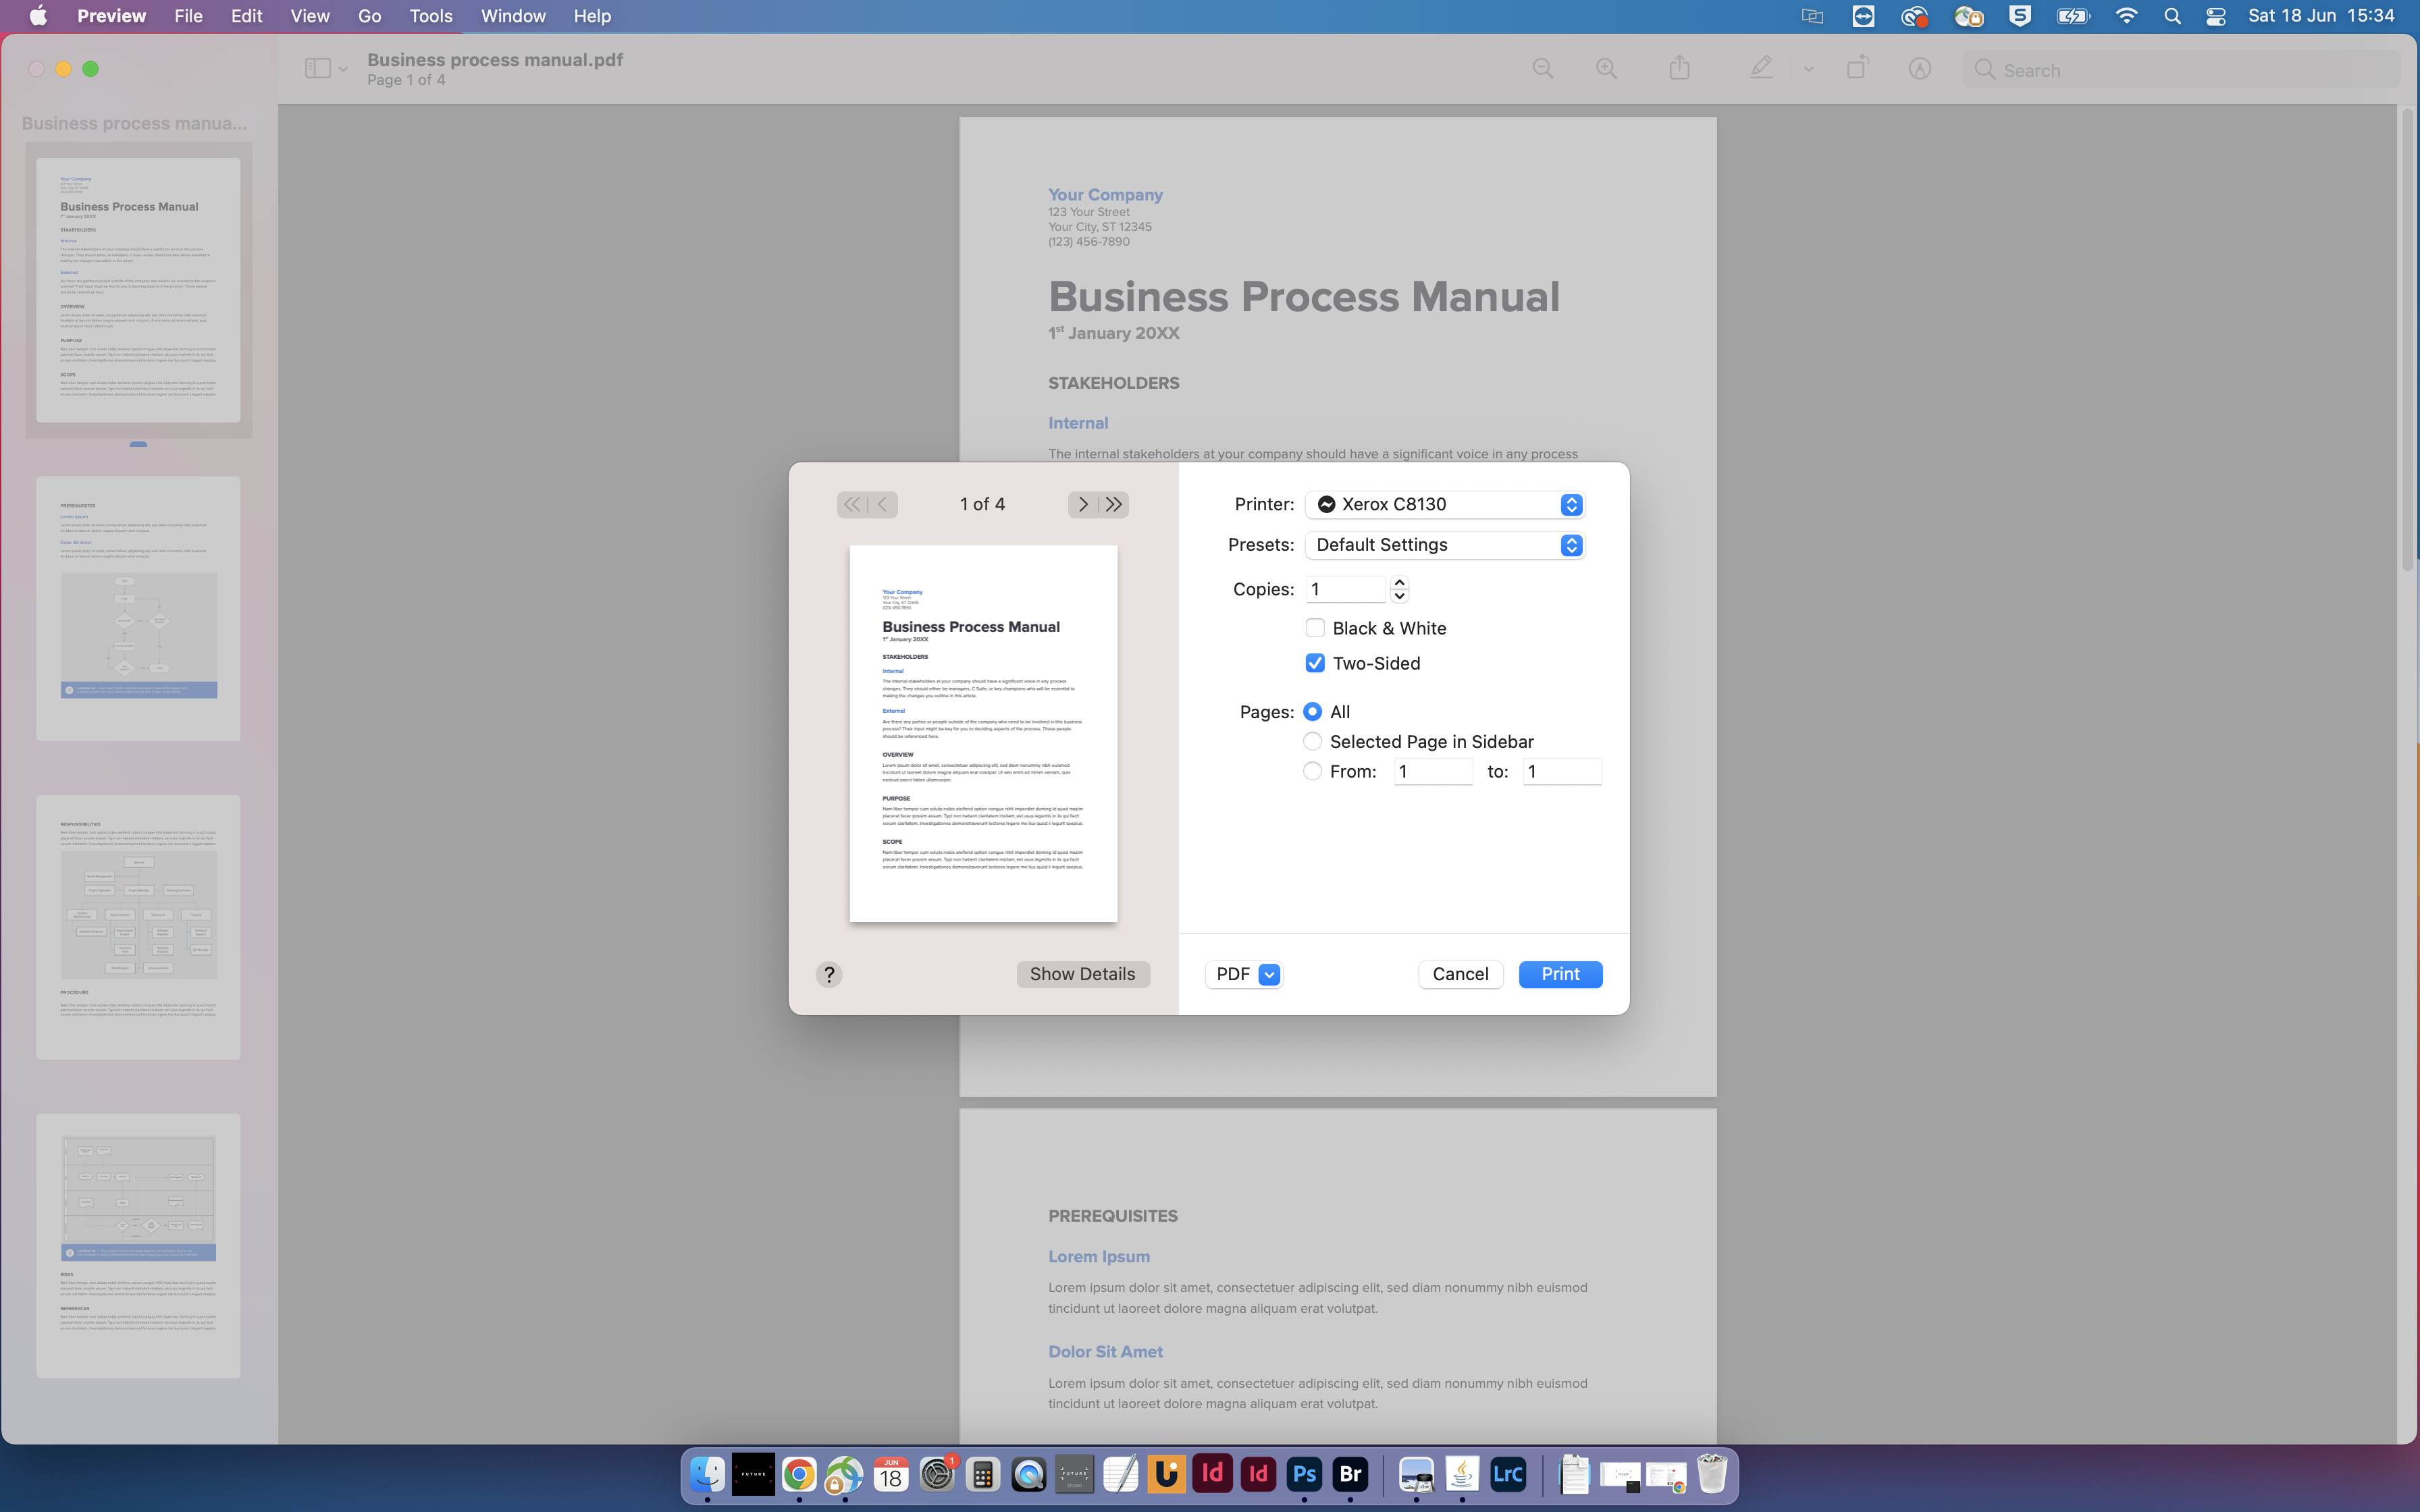
Open your document or image into Preview and go to File>Print or hit the keyboard shortcut Cmd+P. Make sure you’ve hit the button Show Details to have access to the full range of printing options.
Click the Printer drop-down menu and make sure your desired printer is selected. If your printer does not appear be sure to run through troubleshooting options, such as turning it off and on, making sure your computer is connected to it via WiFi or Bluetooth, or plugged in by a cable if it’s an older model, you should then see it appear in the list and you’ll be able to select it.
Step 2
Now you can click on Presets if you’d quickly like to apply some quick settings, such as last settings used or for printing in black and white. To refine the settings further go down and enter how many copies of your document you’d like to be printed.
Sign up to receive the latest news, reviews, buying guides and deals direct to your inbox
This is the number of times it will print the whole document, so if it’s ten pages long and you enter two copies, you’ll end up with a duplicate of every page giving you 20 in total. You can also enable Two-Sided printing to reduce paper waste, so a ten page document will be reduced down to five sheets of paper with text on both sides.
Step 3
Next, head down to Pages where it will, by default, be set to print all of the pages in your document. You can cut this down to specific selection of pages by entering a range in the From box, such as from page five to page eight.
You’ll also see the option ‘Selected Pages in Sidebar’. You need to do this before bringing up the Print dialogue box (click Cancel to exit if you need to). Then, in your document you can hold Cmd and click on every page that you want to be printed from the sidebar. When they’re all highlighted, hit Cmd+P to bring up the Printing prompt once again.
Step 4
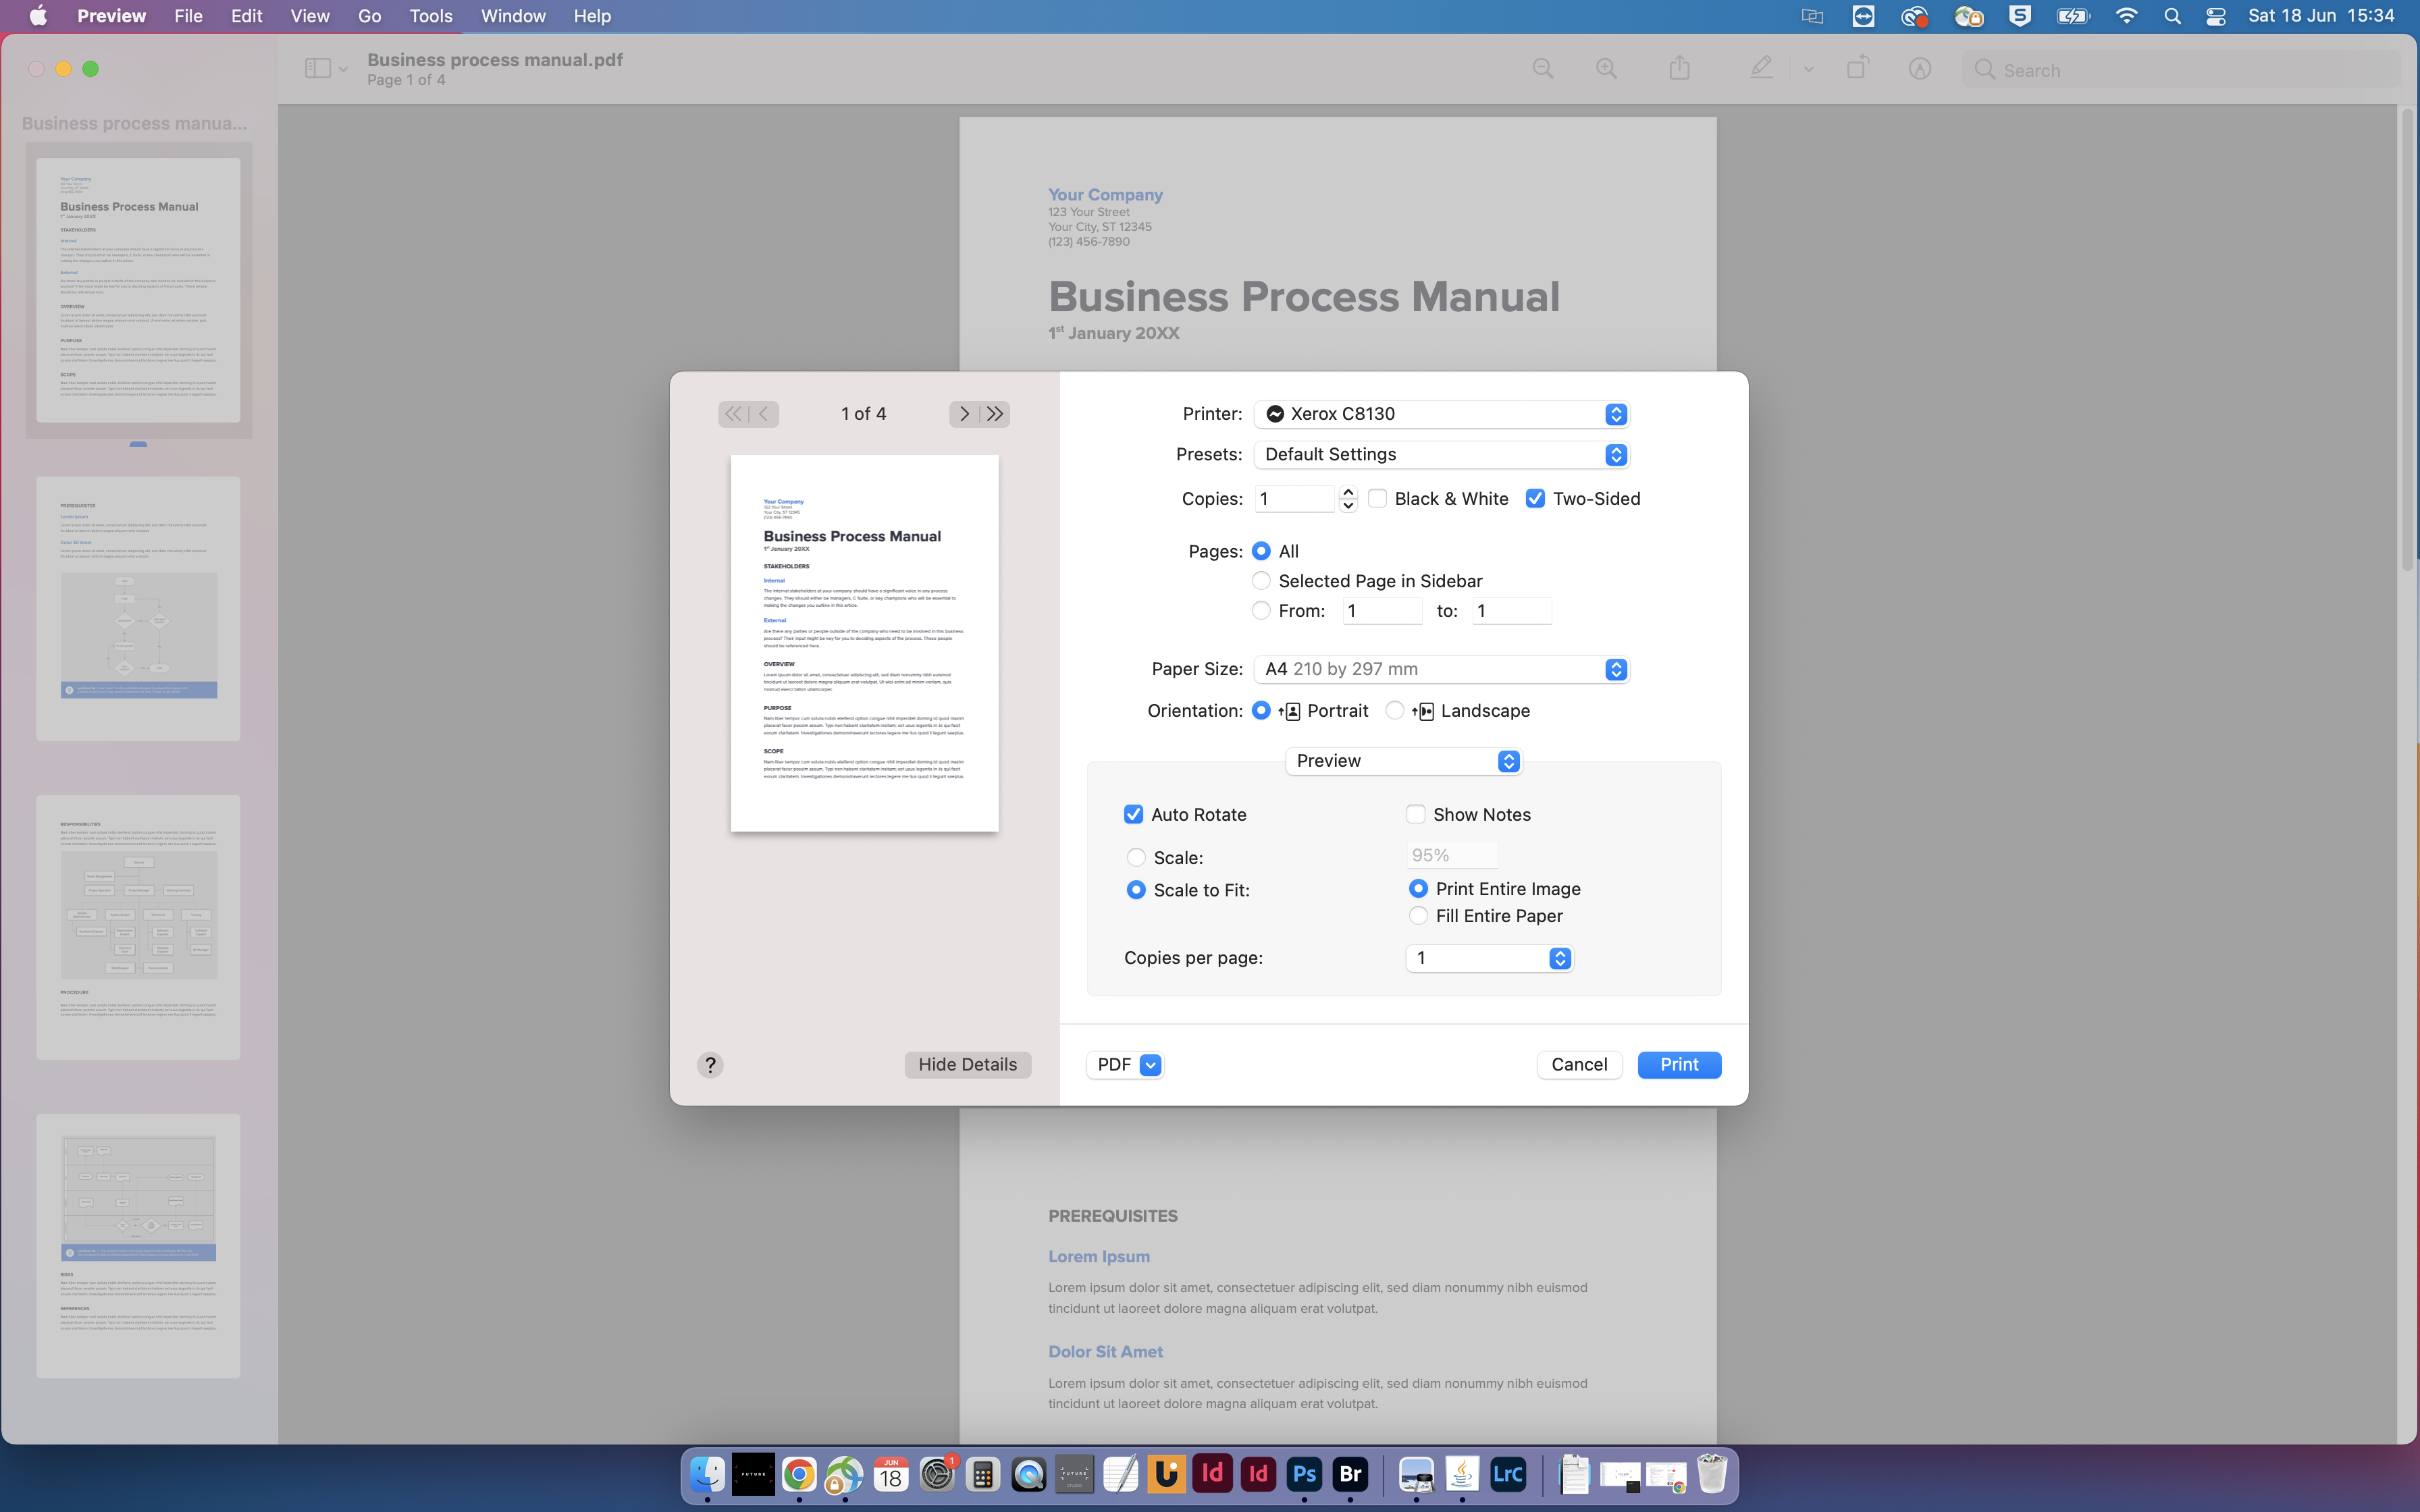
Now you can set the Paper Size to the correct format. A4 will be the most commonly used on home office printers, though you can of course choose different if you have a different paper format loaded into your printer, such as a letter or A3. Then make sure the Orientation is set correctly to Portrait or Landscape. For documents you’ll want to choose Portrait.
On the left of the printing dialogue box you’ll see a preview. This can be customized using the Preview option at the bottom to give you an accurate idea of how your document will look when printed, make sure Auto Rotate is ticked and fine-tune your scaling with the Scale and Scale to Fit options to make sure nothing is left off the page.
Step 5
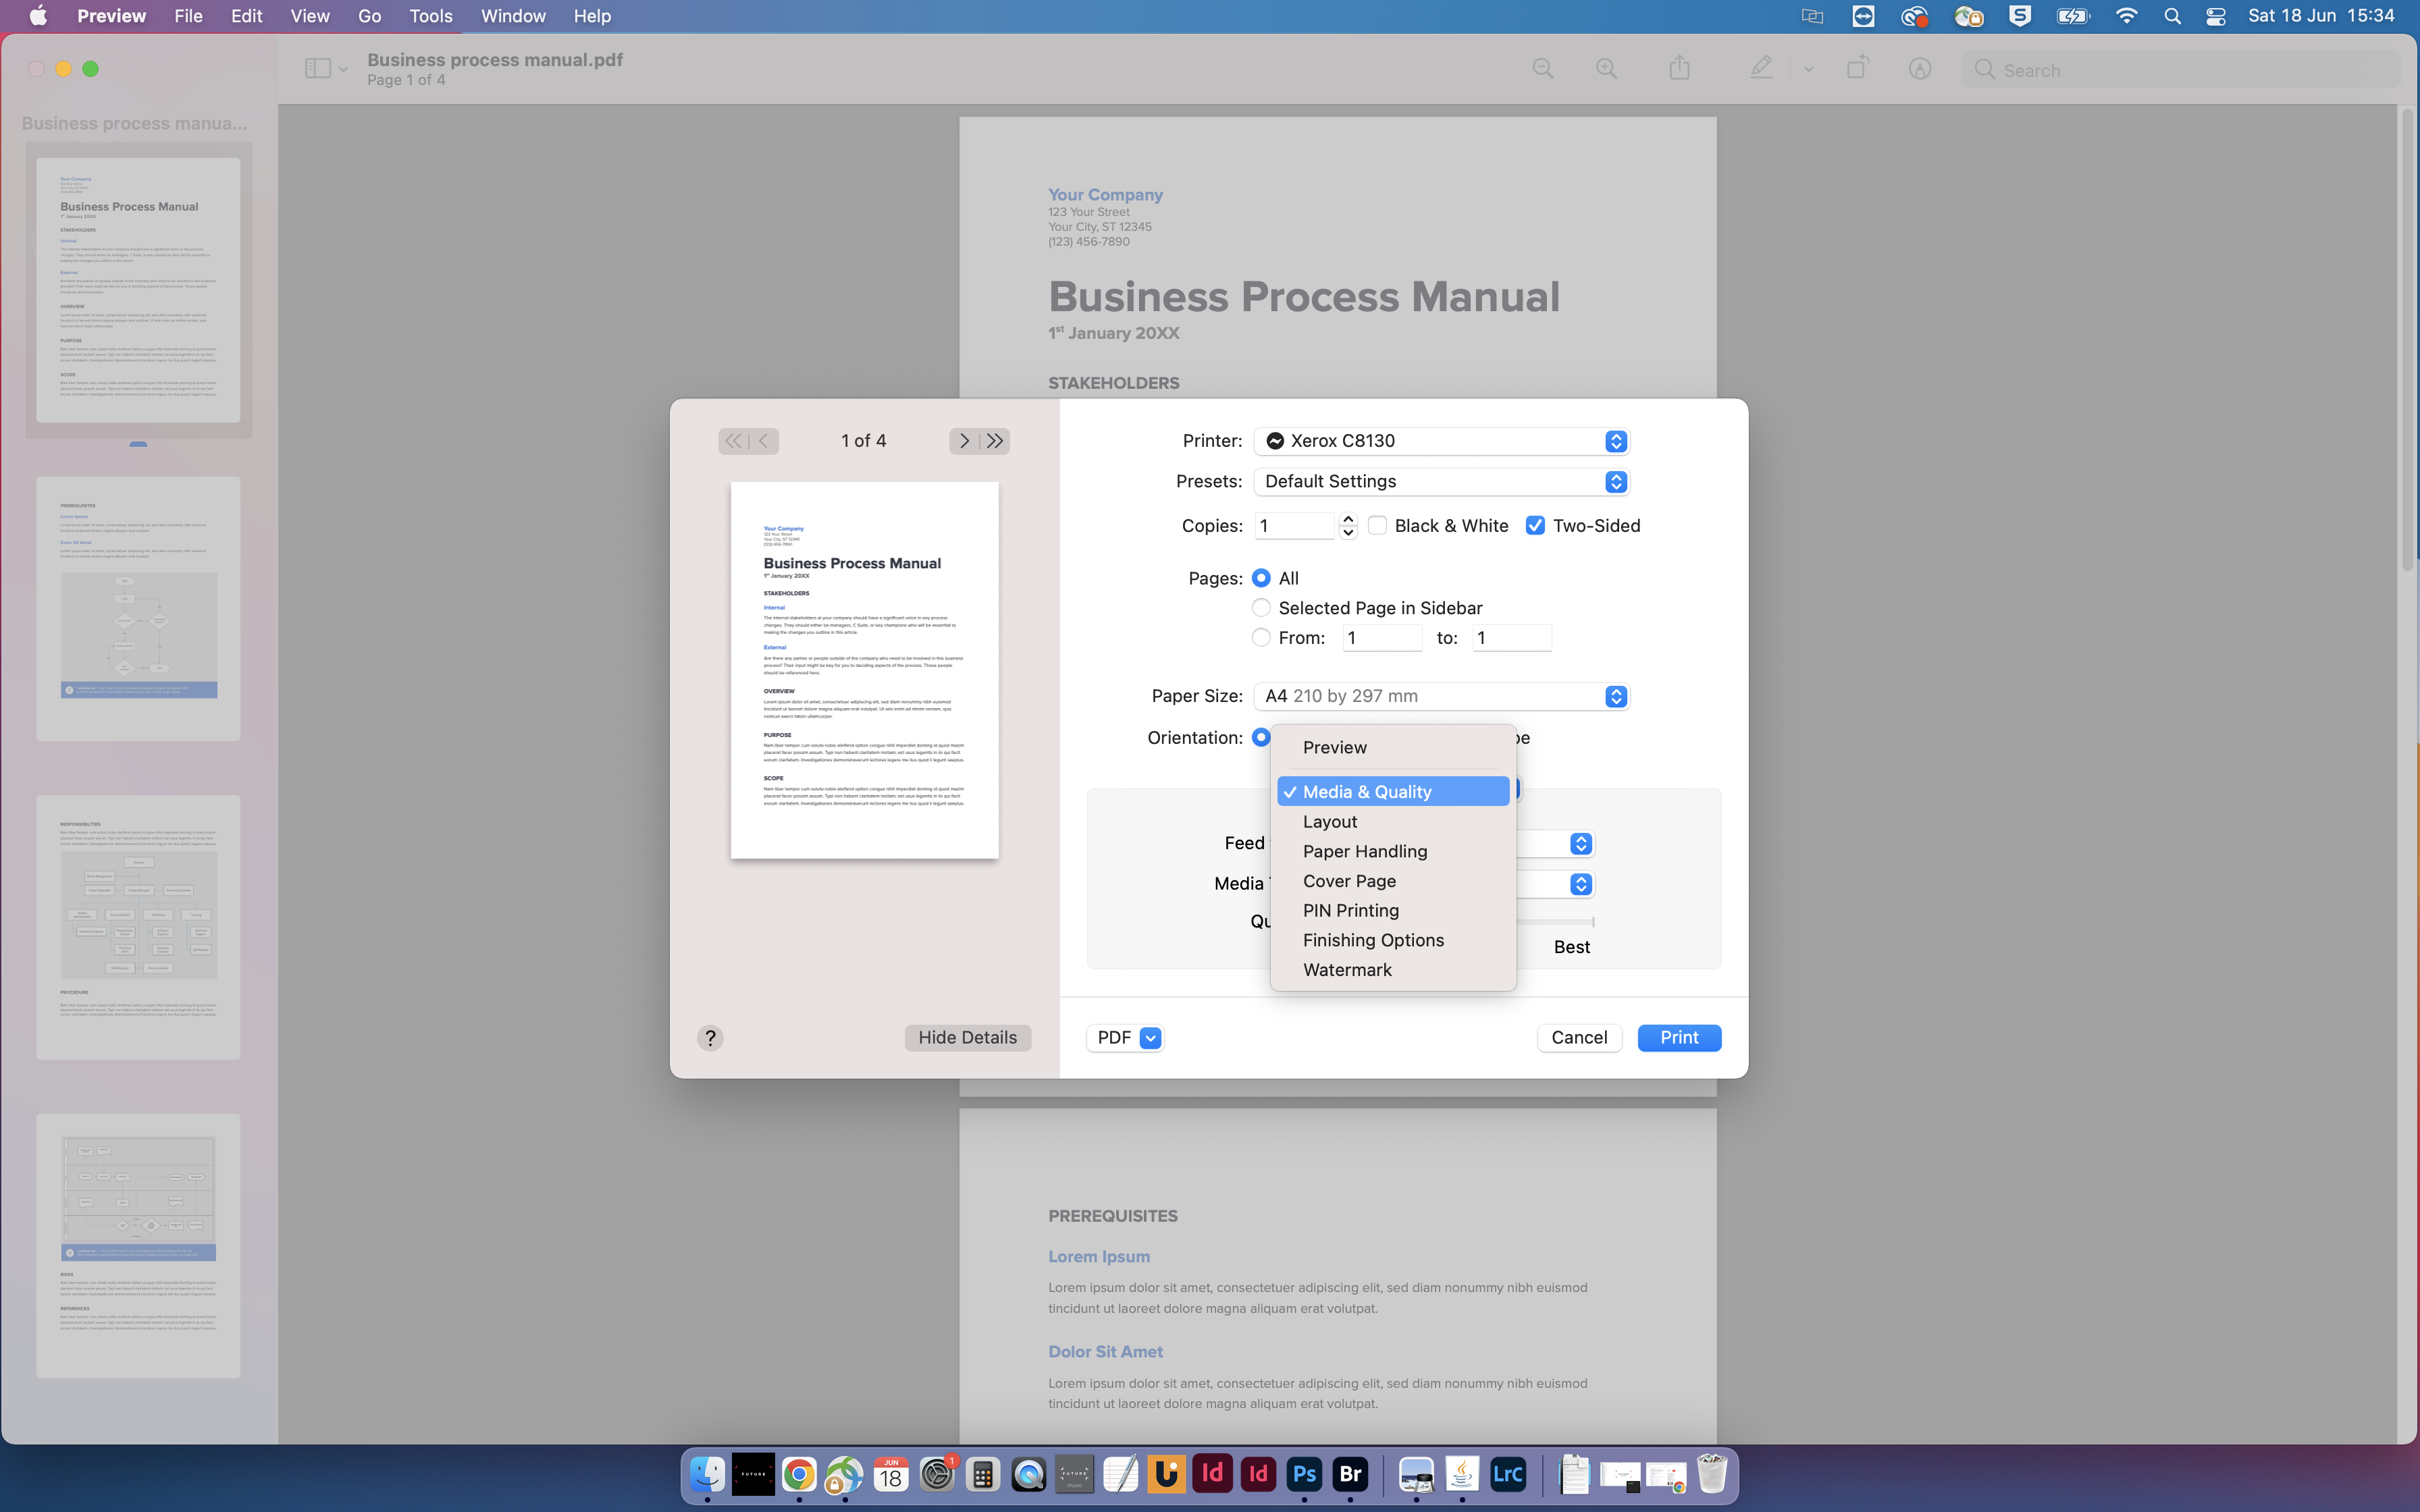
It’s also worth clicking the Preview drop-down box and going to Media & Quality as here you can choose which printer tray to print from on larger printers, the media type and you can set the print quality to draft, normal or best. You also have options for Layout, Paper Handling, Cover Page, PIN Printing, Finishing Options and Watermark, but these aren’t as essential though can still be worth checking out if you specifically need these feature.
Step 6
If you’ve dialed in your settings and you think you'd like to be able to use them again, go to Presets and choose Save Current Settings as Preset. Give your Preset a name and choose whether you want the preset to be available for any printer in the future, or just the printer that you’re currently connected to and hit OK. And that’s it, you’re all set and ready to get printing!
Discover more guides for the home office…
Best home computer
Best photo printers
Best keyboards for home office
Best touch screen monitors
Dan is Technique Editor on PhotoPlus: The Canon Magazine magazine. With over a decade writing about all things tech he’s written for a variety of publications before joining Future in April 2019 in that time working across Top Ten Reviews, Digital Camera World, PhotoPlus, NPhoto, Digital Camera and Digital Photographer.
