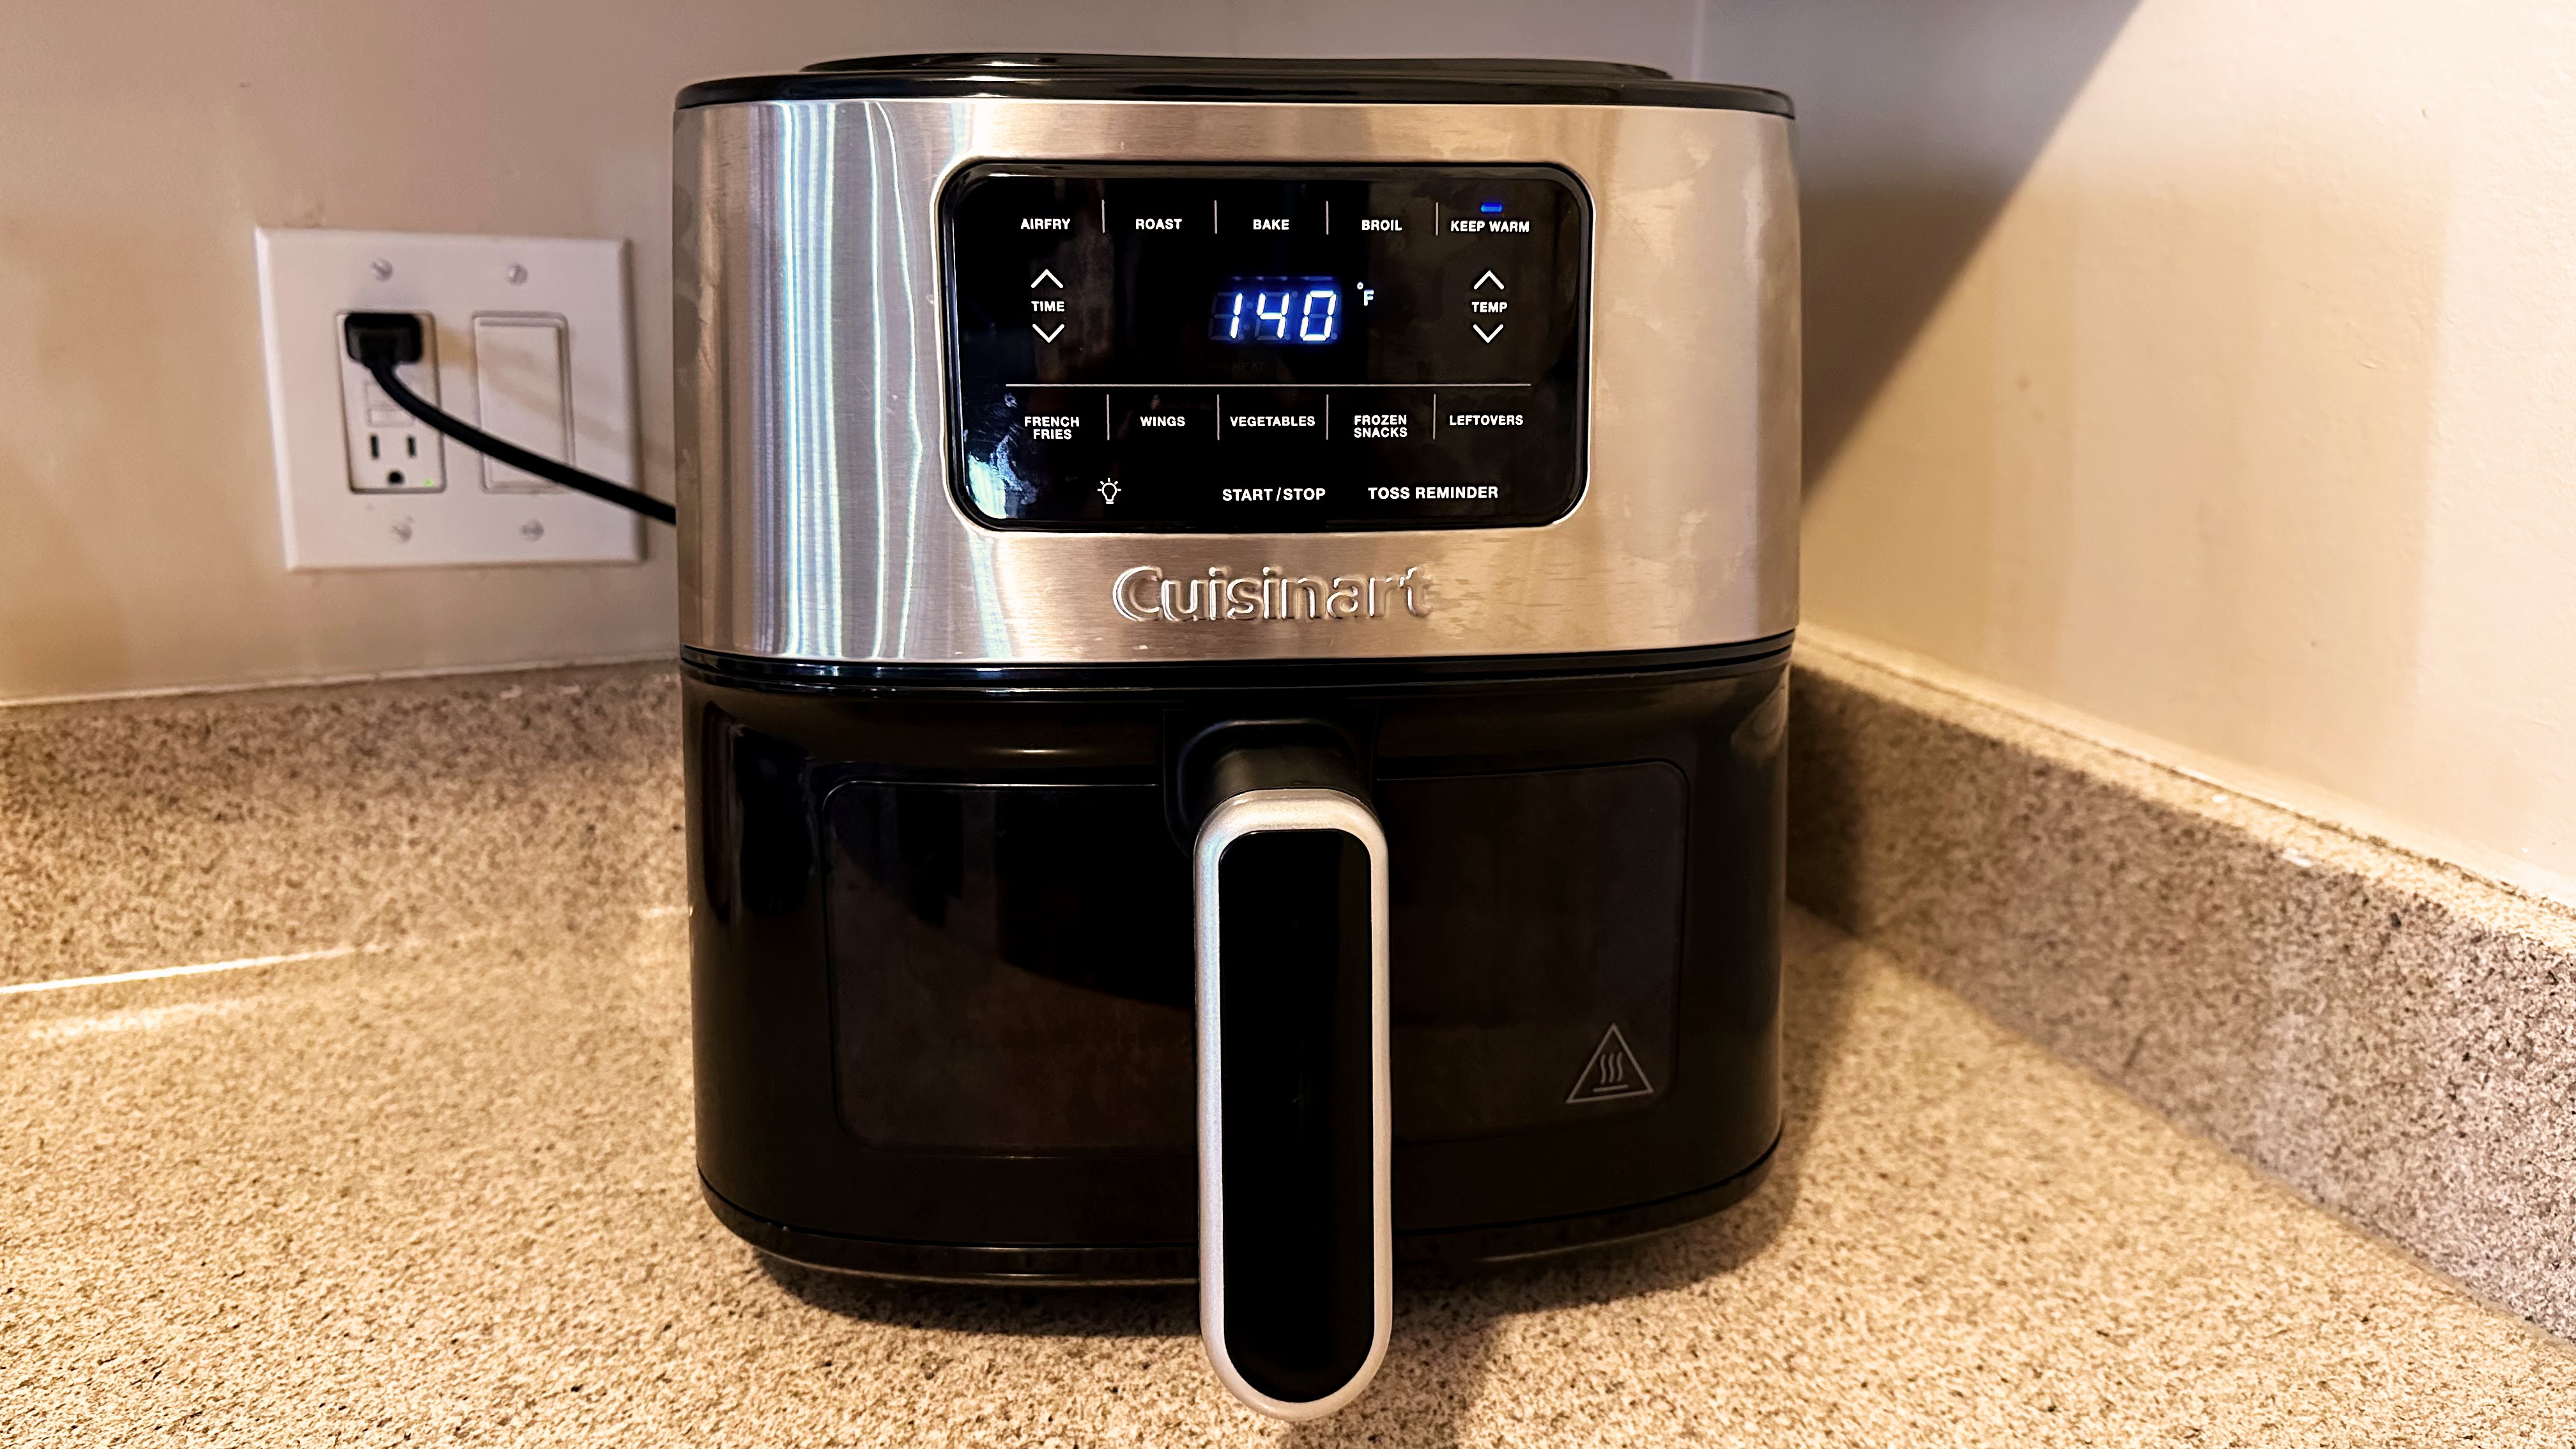
Top Ten Reviews Verdict
The Cuisinart Basket Air Fryer Air-200 makes delicious food that can be observed as it cooks using a handy viewing window with easy clean-up afterward, though some of its settings are useless.
Pros
- +
Makes crisp, perfectly browned food
- +
Easy clean up
- +
Food viewing window with light
Cons
- -
Pricier than other air fryers
- -
Crisper plate doesn’t stay in place when dumping the basket
- -
Some preset/cooking functions are gimmicky
Why you can trust Top Ten Reviews
The Cuisinart Basket Air Fryer Air-200 has a lot going for it—at least on paper—from multiple cooking functions and an LCD panel for easier use to a viewing window and crisper plate ensuring optimal results. After two weeks of daily use, I have to say I was pleasantly surprised by the air fryer’s performance, delivering delicious, crisp, and perfectly done food almost every time. However, not everything worked as well as advertised.
It's the first-ever basket air fryer to be added to Cuisinart's air fryer lineup, sitting amongst the brand's already renowned Air Fryer Toaster Oven collection and Air Advantage technology. The air fryer space is a competitive market space, and the Cuisinart Basket Air Fryer Air-200 has the specifications to compete. These features could put it with the best air fryers, but only if they deliver.
This device has a similar look to other smaller kitchen appliances and is a little bulky, so those tight on space won’t want to leave it out all the time. The six-quart basket is good-sized, with a non-stick surface and a crisper plate. My favorite feature is the viewing window and light, which lets you observe your food without pulling out the basket and disrupting cooking. Clean-up is as simple as can be, as the basket and crisper are dishwasher safe, but even if you don’t have a dishwasher, food comes off with minimal effort.
One major gripe I have with this air fryer is the crisper plate doesn’t stay in place when you dump the basket of food onto a plate—something you’ll often want to do. That means tongs or other utensils need to be used, or you risk burning yourself to get food out.
The air fryer’s control panel is simple to use. So you can easily adjust cook time and temperature, and there’s even a handy toss reminder. You also get a bunch of cooking functions and presets, which I tested using a variety of foods, and it was a hit or miss, depending on the setting. I couldn’t see or taste a big difference between the air fry, roast, and baking functions when making veggies and chicken. The broil function worked better, browning the tops of my turkey burgers, and the keep warm function managed to keep my food lukewarm after one hour.
Its presets include french fries, veggies, wings, frozen snacks, and leftovers, and for the most part, these buttons didn’t work with their standard settings, either burning or undercooking my food unless I made adjustments. The only exception is the leftover button that perfectly reheated my food without fail, and I didn’t get a chance to test the wings preset. Even though some settings are gimmicky, the Cuisinart Basket Air Fryer succeeds at its main purpose of making delicious meals without turning on the oven or using excess oil.

Danielle Abraham is a freelance writer who spends most of her time covering tech products. You’ll find she’s written about everything from mice and wireless headphones to coffee makers and toothbrushes at some of the top publications, including IGN, TechRadar, and TopTenReviews. She has previously used air fryers from brands like Ninja and Power XL. In Danielle’s testing, she cooked meals multiple times per day using the air fryer’s cooking functions and presets over a two-week span.
Cuisinart Basket Air-200: Key specs
| Model no: | Air-200 |
| Cooking functions | Air Fry, Roast, Bake, Broil and Keep Warm |
| Wattage | 1,800 watts |
| Cooking temperature | up to 450°F |
| Power cord length | 3 feet |
| Basket capacity | 6 quarts |
| Noise | 55-60dB |
| Dimensions | 12.0 x 16.5 x 12.25 inches (L x W x H) |
| Weight | 15.5 pounds |
Cuisinart Basket Air Fryer Air-200: Price & availability
The Cuisinart Basket Air Fryer’s list price is $149.95 and is available from the manufacturer’s website. You can also find it at retailers like Amazon, Target, and Walmart.
Sign up to receive the latest news, reviews, buying guides and deals direct to your inbox
The price of this air fryer is on par or slightly more than other six-quart offerings, but with several presets, a handy viewing window, and reliability, it’s worth spending a little extra.
Cuisinart Basket Air-200: Setup
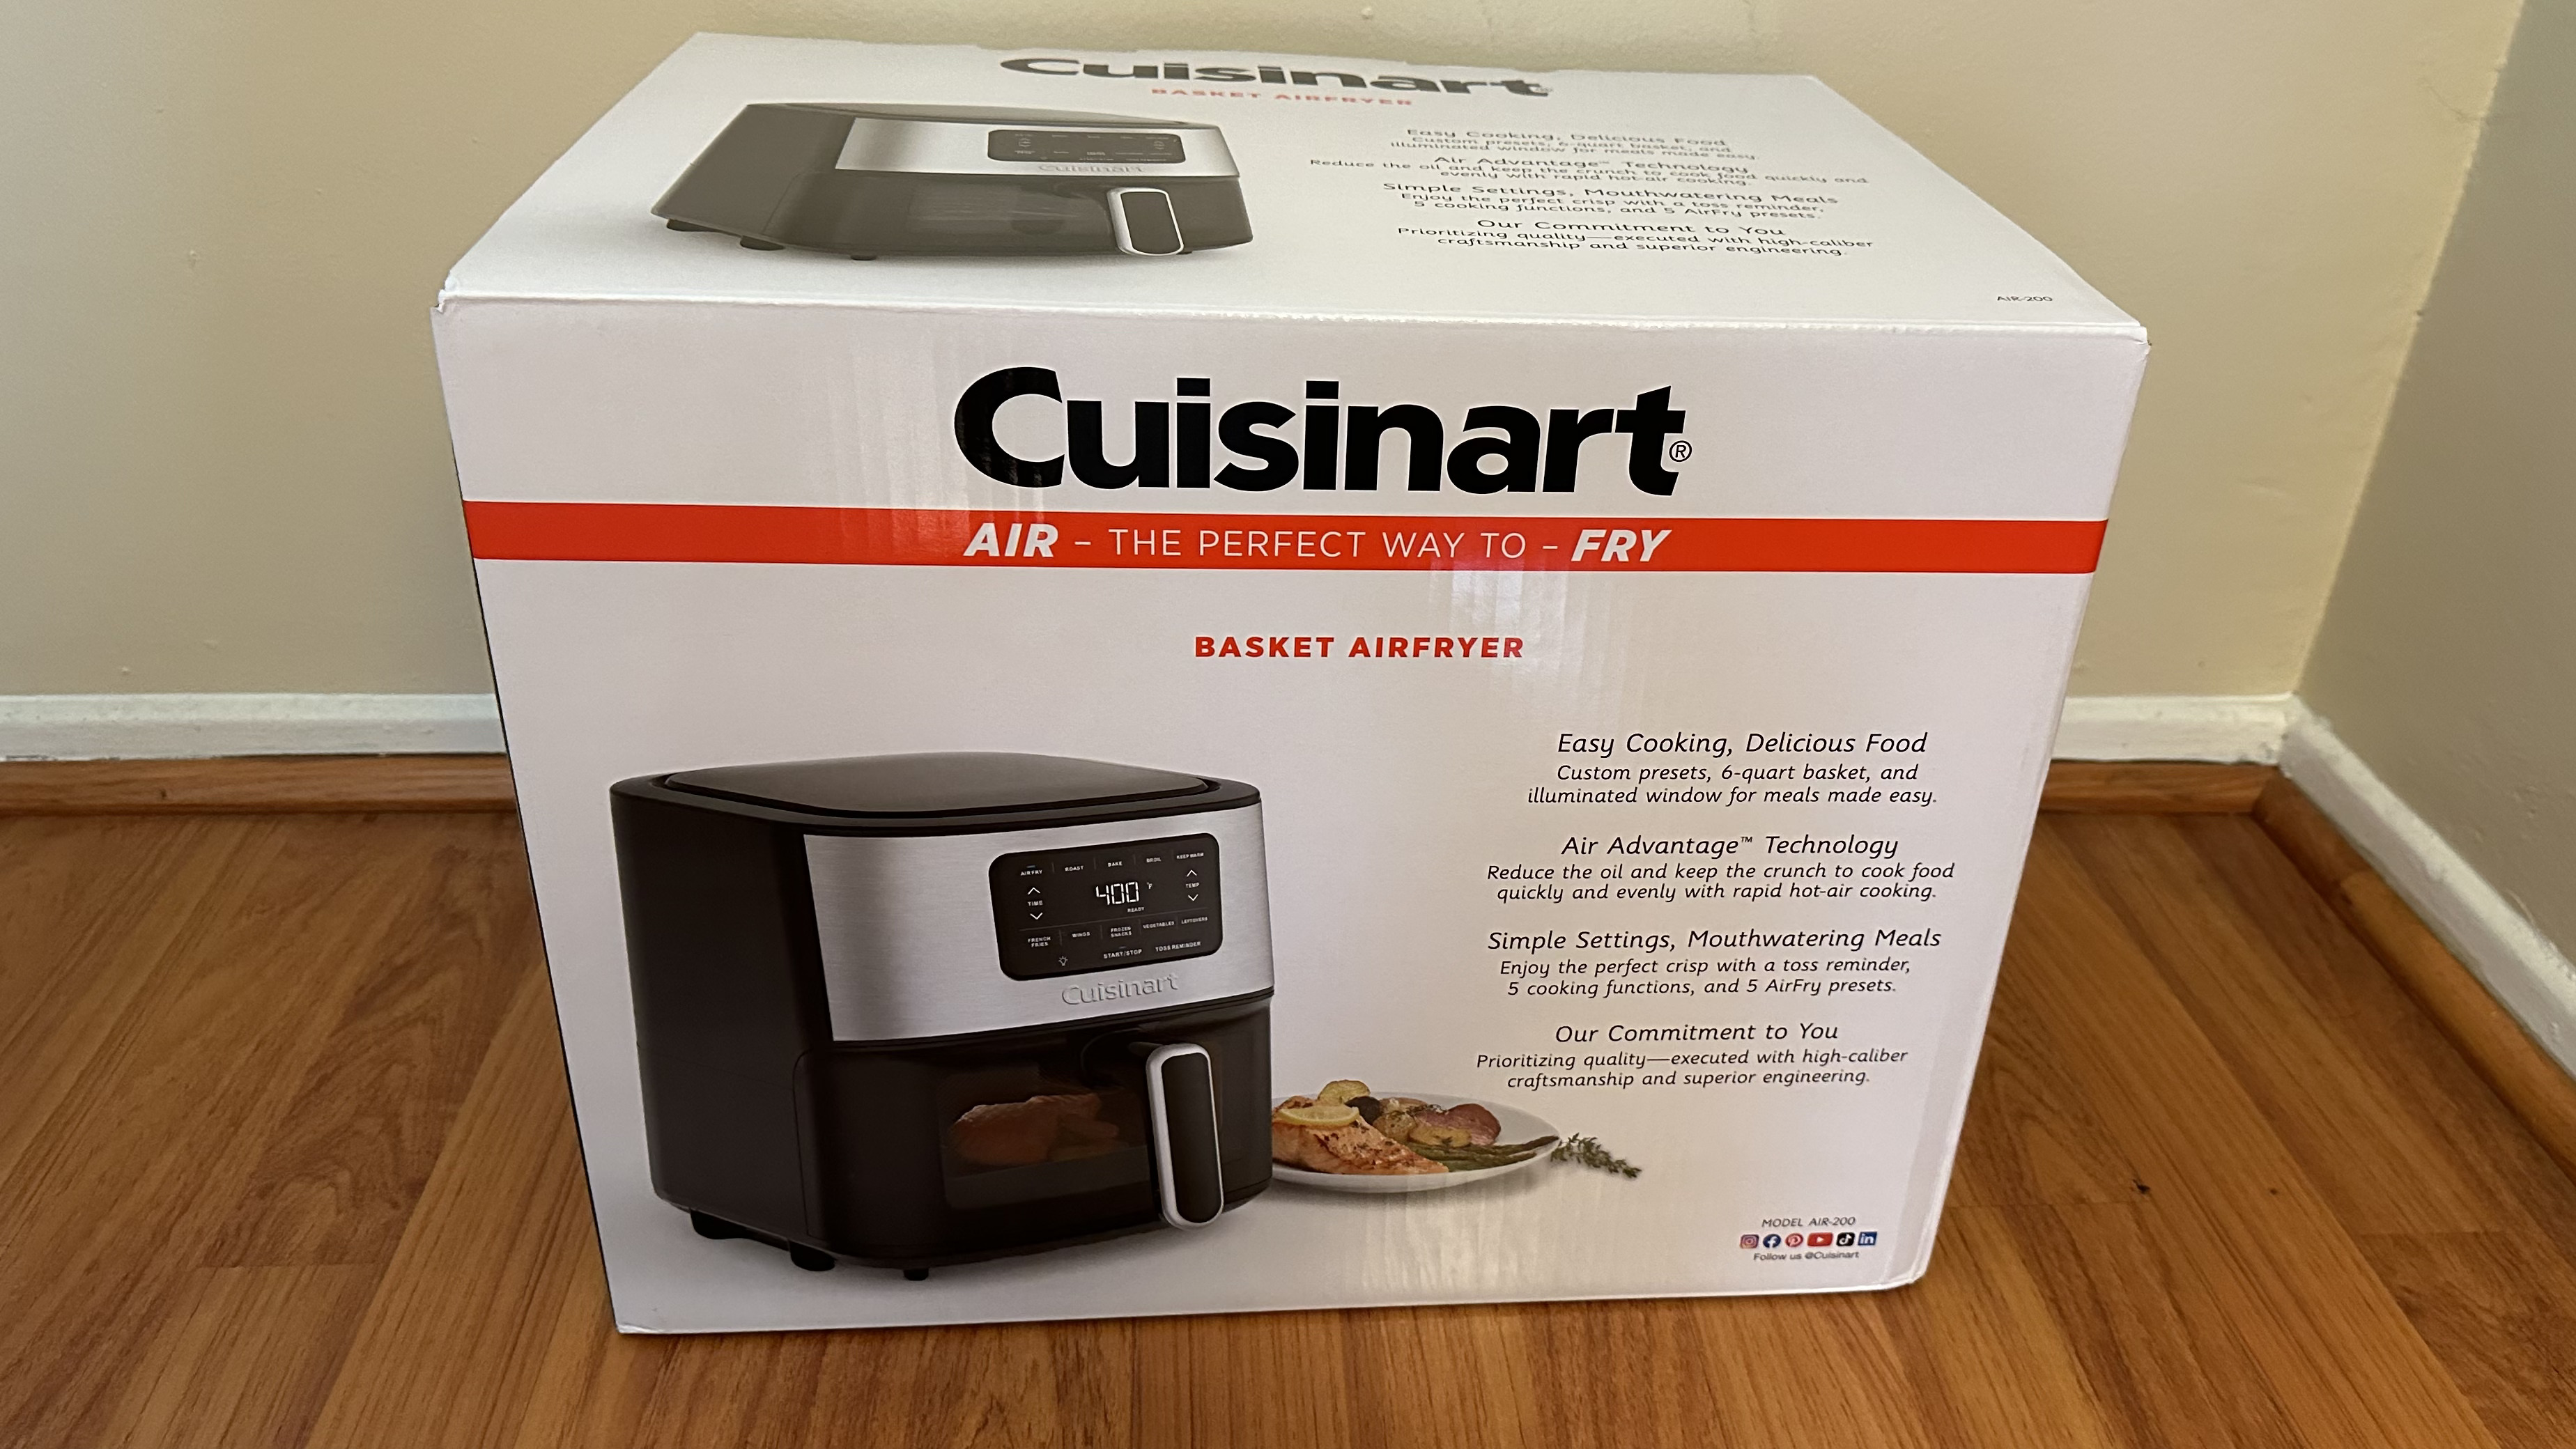
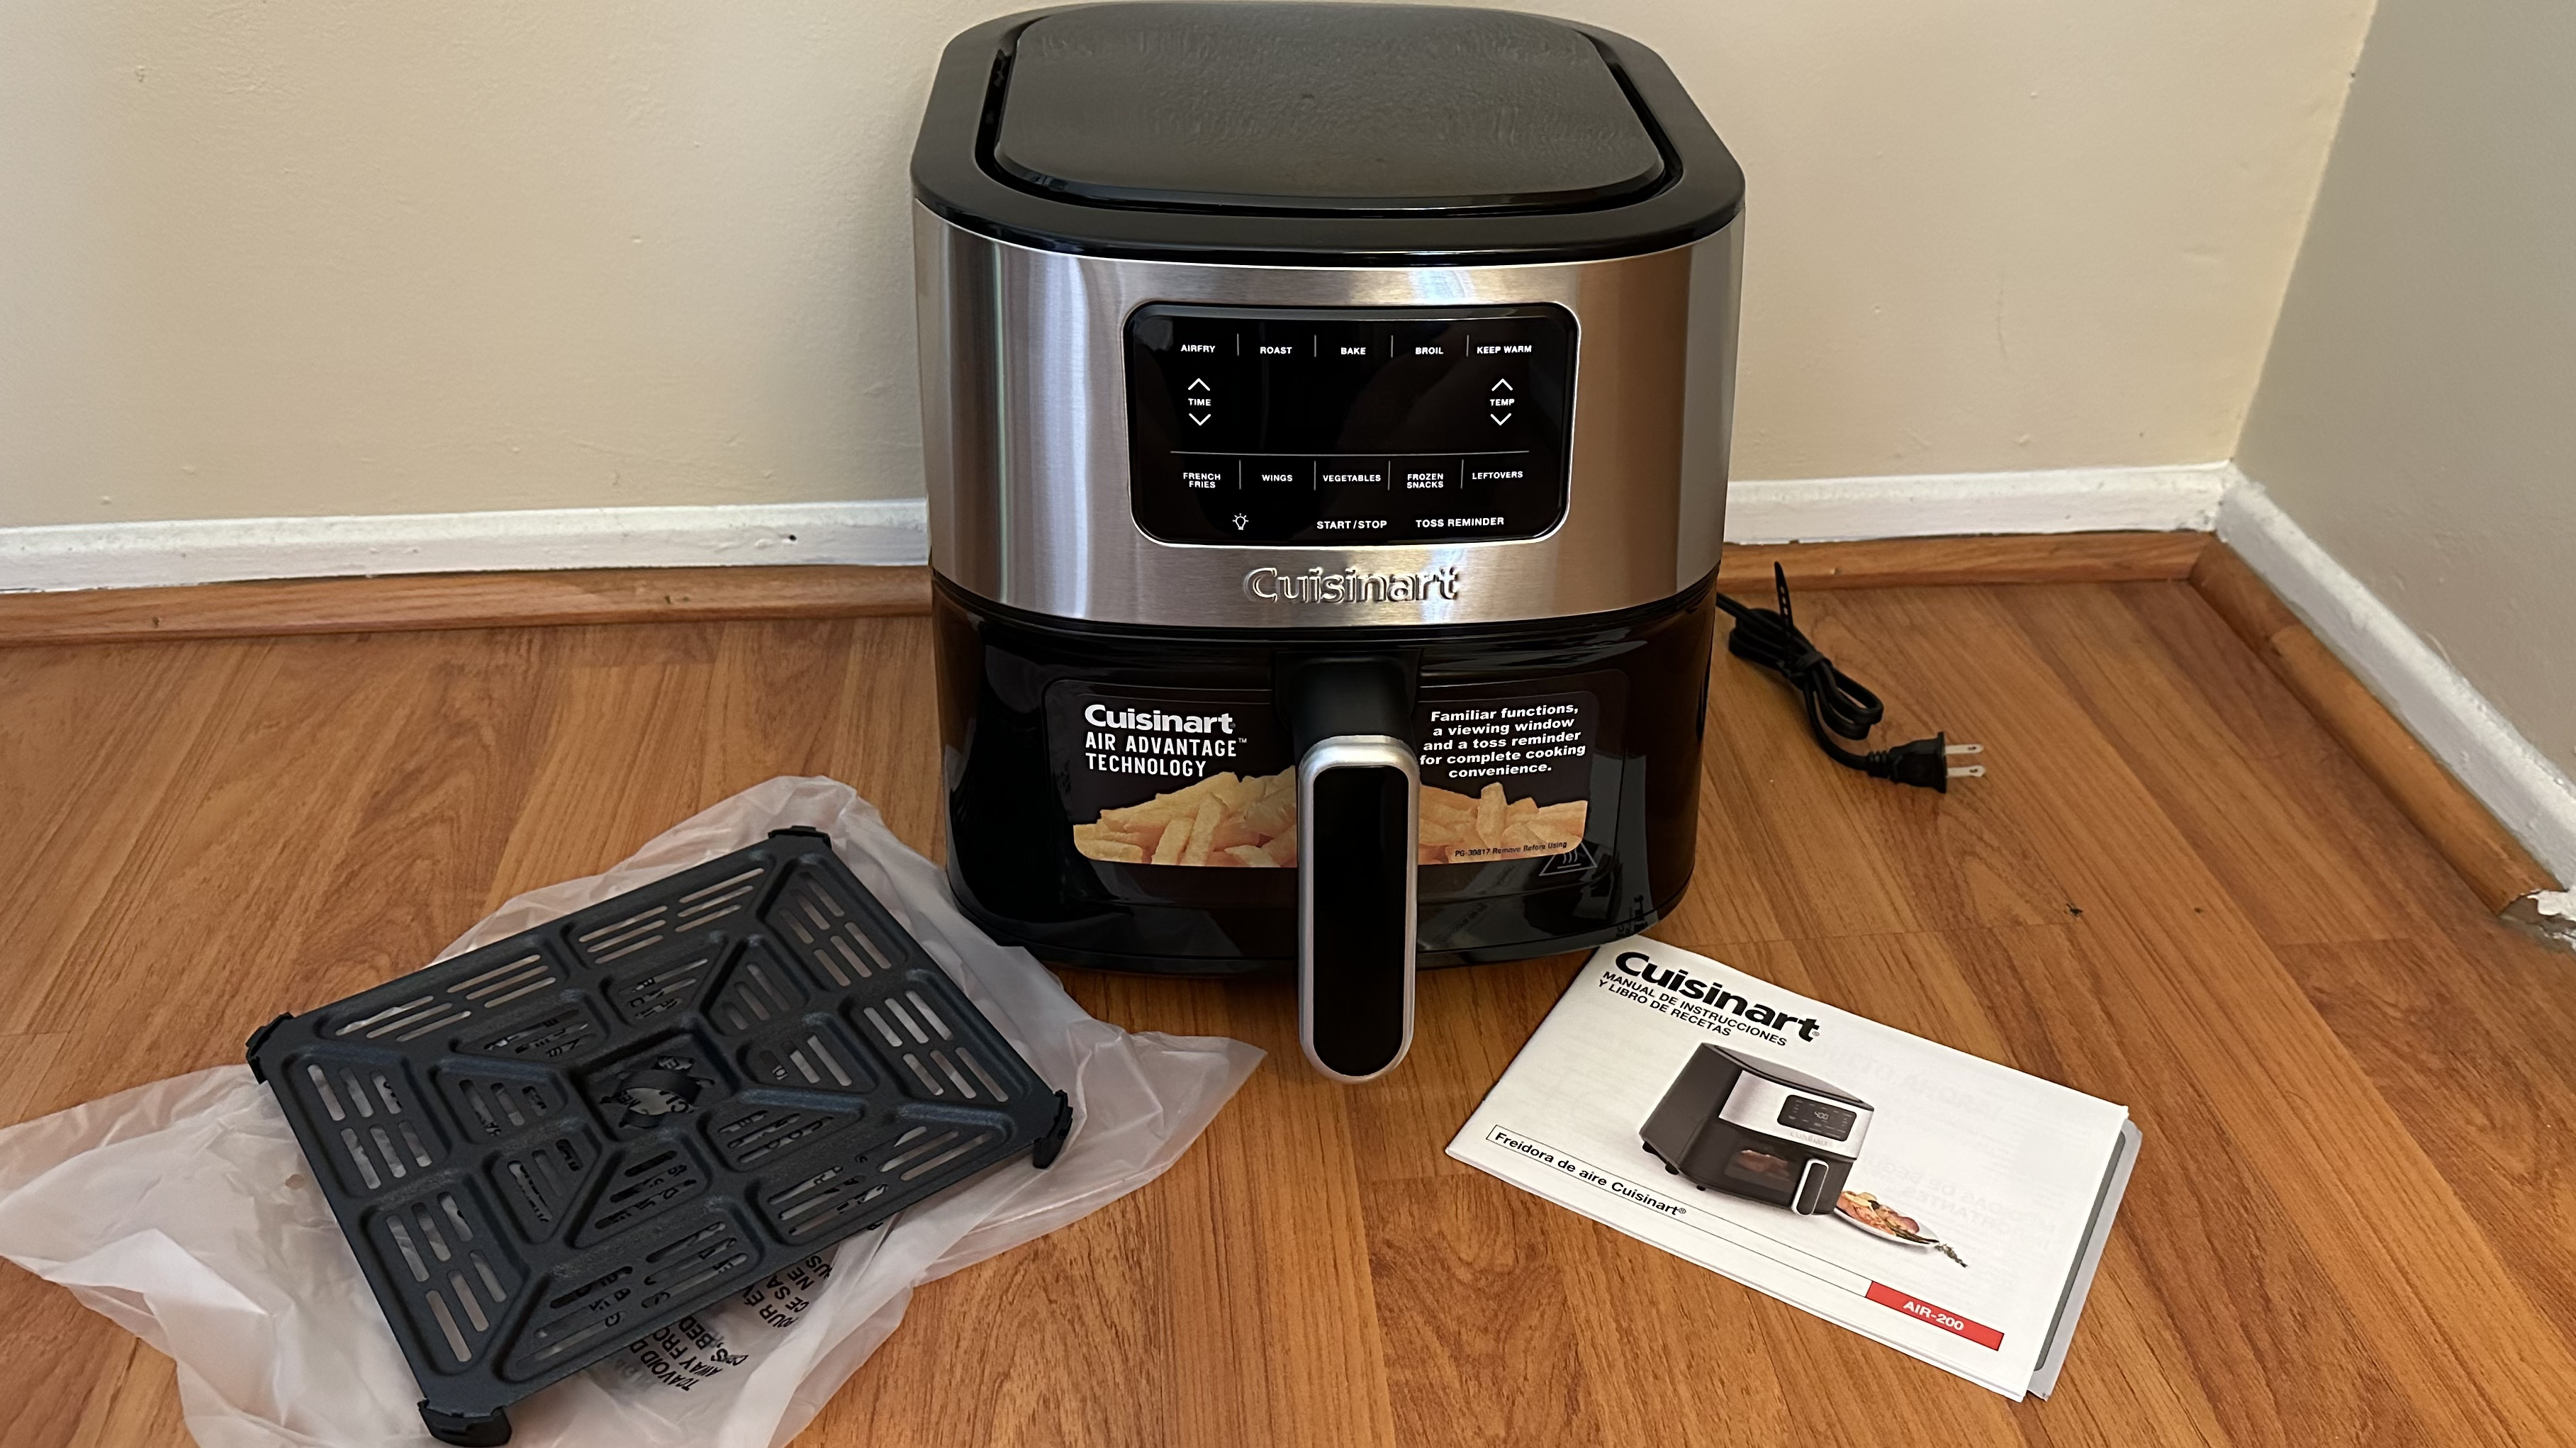
The Cuisinart Basket Air Fryer Air-200 arrived in a medium-sized, manageable cardboard box. Once you open that box, there’s a box of similar size inside it that highlights the features of the device on the outside. Upon opening that box, you’re greeted with an instruction booklet and a crisper plate wrapped in plastic. I was happy to see that recyclable cardboard protected the Air Fryer rather than styrofoam during shipping, making it slightly more sustainable. Under that piece of recyclable cardboard was the air fryer wrapped in plastic.
I placed the basket air fryer on my counter, and it’s bulky but on par with others I’ve used. Its looks match most smaller kitchen appliances, featuring black plastic in the build with stainless steel accents. There’s a large handle to pull out the basket on the air fryer and a viewing window to watch your food as it cooks. It’s not the most stunning appliance, but it looks like it’ll deliver.
You’ll be good to begin cooking basically straight out of the box. I only had to insert the crisper plate into the basket and remove a sticker for it to be ready. I decided to wash the basket and crisper plate, though the instructions don’t even mention that as a necessity. From there, you just plug the machine in, and you’ll be good to go—a super simple setup.
My first time using the Cuisinart Basket Air Fryer was a success. There are a bunch of settings on the device, which I will discuss later, but I decided to stick to the basics and only use the air fryer setting. I made frozen samosas and sweet potato fries, following the air fryer instructions on the food’s packaging. Both turned out hot, evenly cooked, and crispy after the recommended cooking time on their packaging—what more could you ask for?
It’s clear the Cuisinart Basket Air Fryer can handle the basics, but I put it through more rigorous testing to see if the device could deliver in various cooking scenarios and how the different settings stacked up in use.
Cuisinart Basket Air-200: Design
Measuring 12.0 x 16.5 x 12.25 inches, the Cuisinart Basket Air Fryer Air-200 is not the most compact appliance, but its size is similar to other basket air fryers. If you have a good amount of counter space, it would be possible to leave it out all the time. But for those tight on space, like me, it’s just too bulky to leave out, especially when you’ve already got microwaves, toasters, and coffee machines out all the time. Luckily, the appliance is easy enough to move around to tuck away in a cabinet or closet.
With a black plastic build featuring stainless steel around the control panel and part of the handle, the air fryer blends with most other kitchen appliances. It's not exactly the most stunning thing to look at, but it won’t be a giant eyesore in your kitchen. Similar to most stainless steel appliances, fingerprints become a problem almost immediately.
Around the back of the machine, you’ll find the vent for air, so be sure you’ve got it a couple of inches away from the wall. That’s also where the three-foot cord power cord is, along with a handy little place to wrap the cord around for storage.
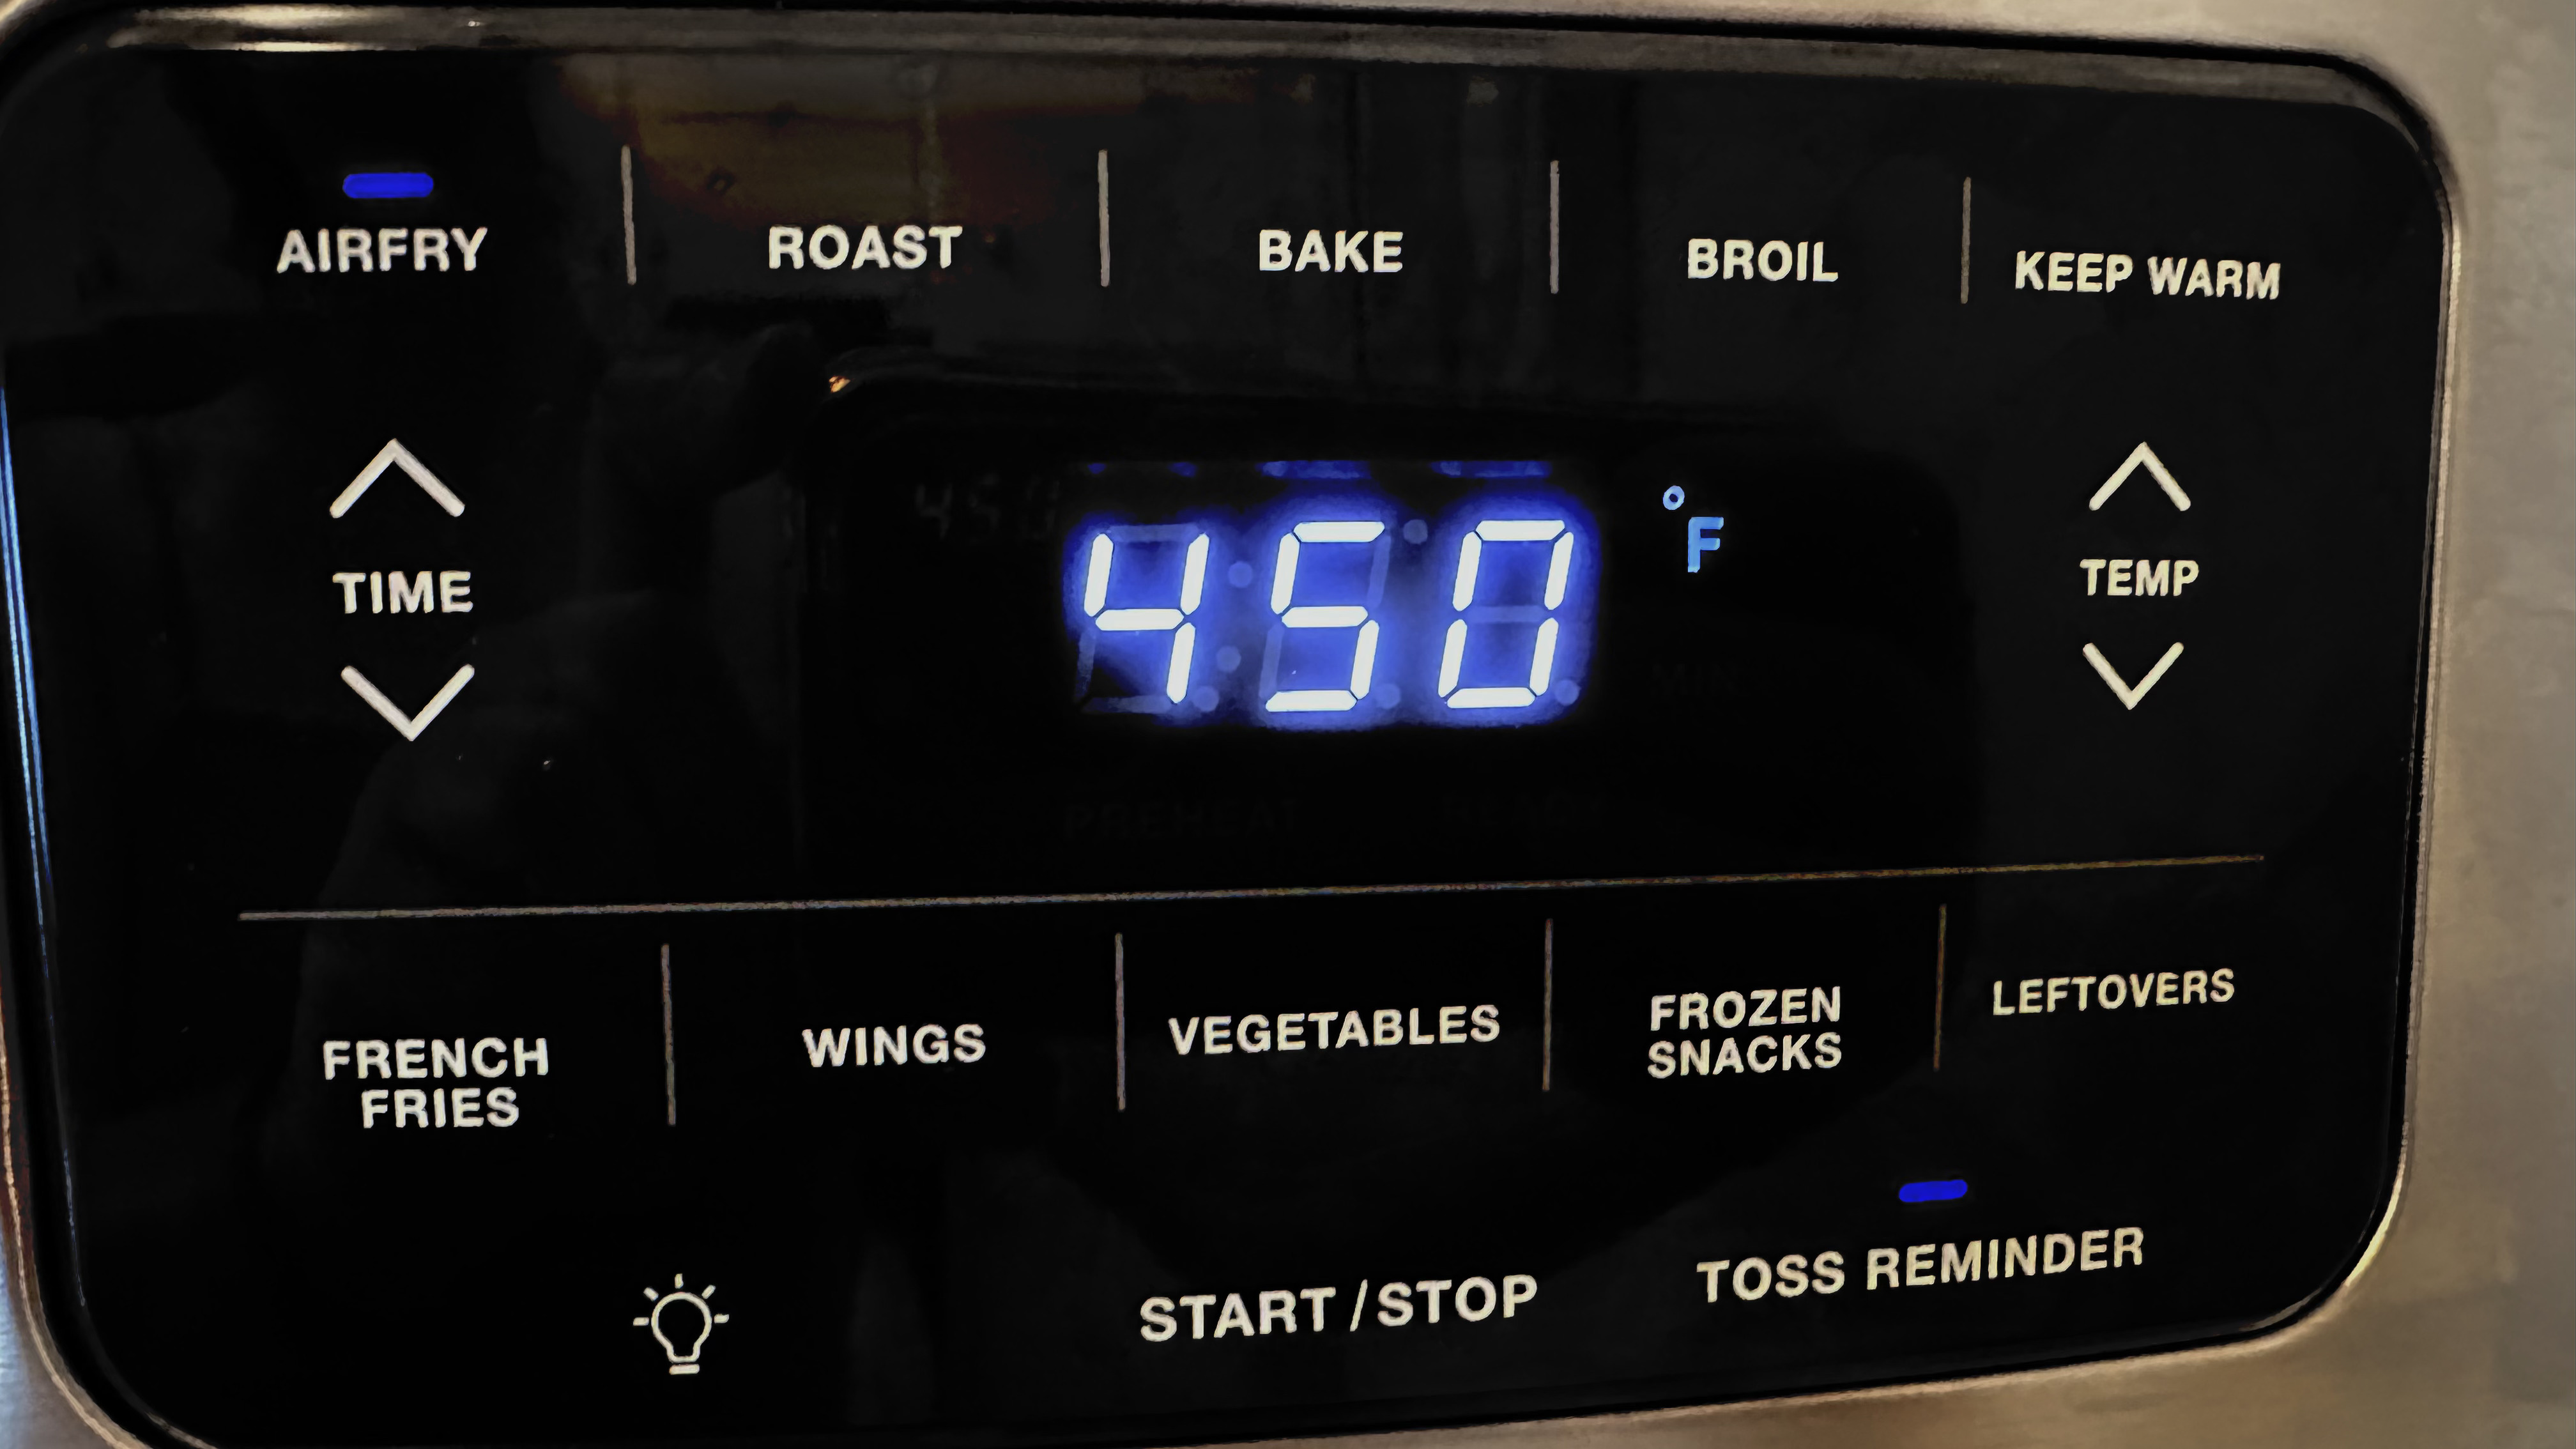
The control panel at the front features cooking function buttons that include Air Fry, Roast, Bake, Broil, and Keep Warm. There are also Air Fry presets, like something seen on a microwave with French fries, wings, vegetables, frozen snacks, and leftovers. A blue light will illuminate your selection, while an LCD panel displays the cooking temperature and time with buttons for adjustment on either side. You can cook food up to 450°F for 60 minutes. Finally, the bottom of the display has a toss reminder, which will illuminate if it’s activated, a start/stop button, and a light bulb to turn on the oven light.
A missing feature that I would have appreciated is an on/off button or switch. Instead, the stop/start button acts as an off function. The LCD illuminates the word “off” when it’s off. I prefer the security of an actual switch. Of course, I always unplug the appliance after use to be sure.
One of my favorite design features is the oven light and window on the basket to show how your food is cooking. This way, you can check on the food to ensure it’s not burning without letting out hot air. The light will illuminate for 20 seconds and then automatically shut off.
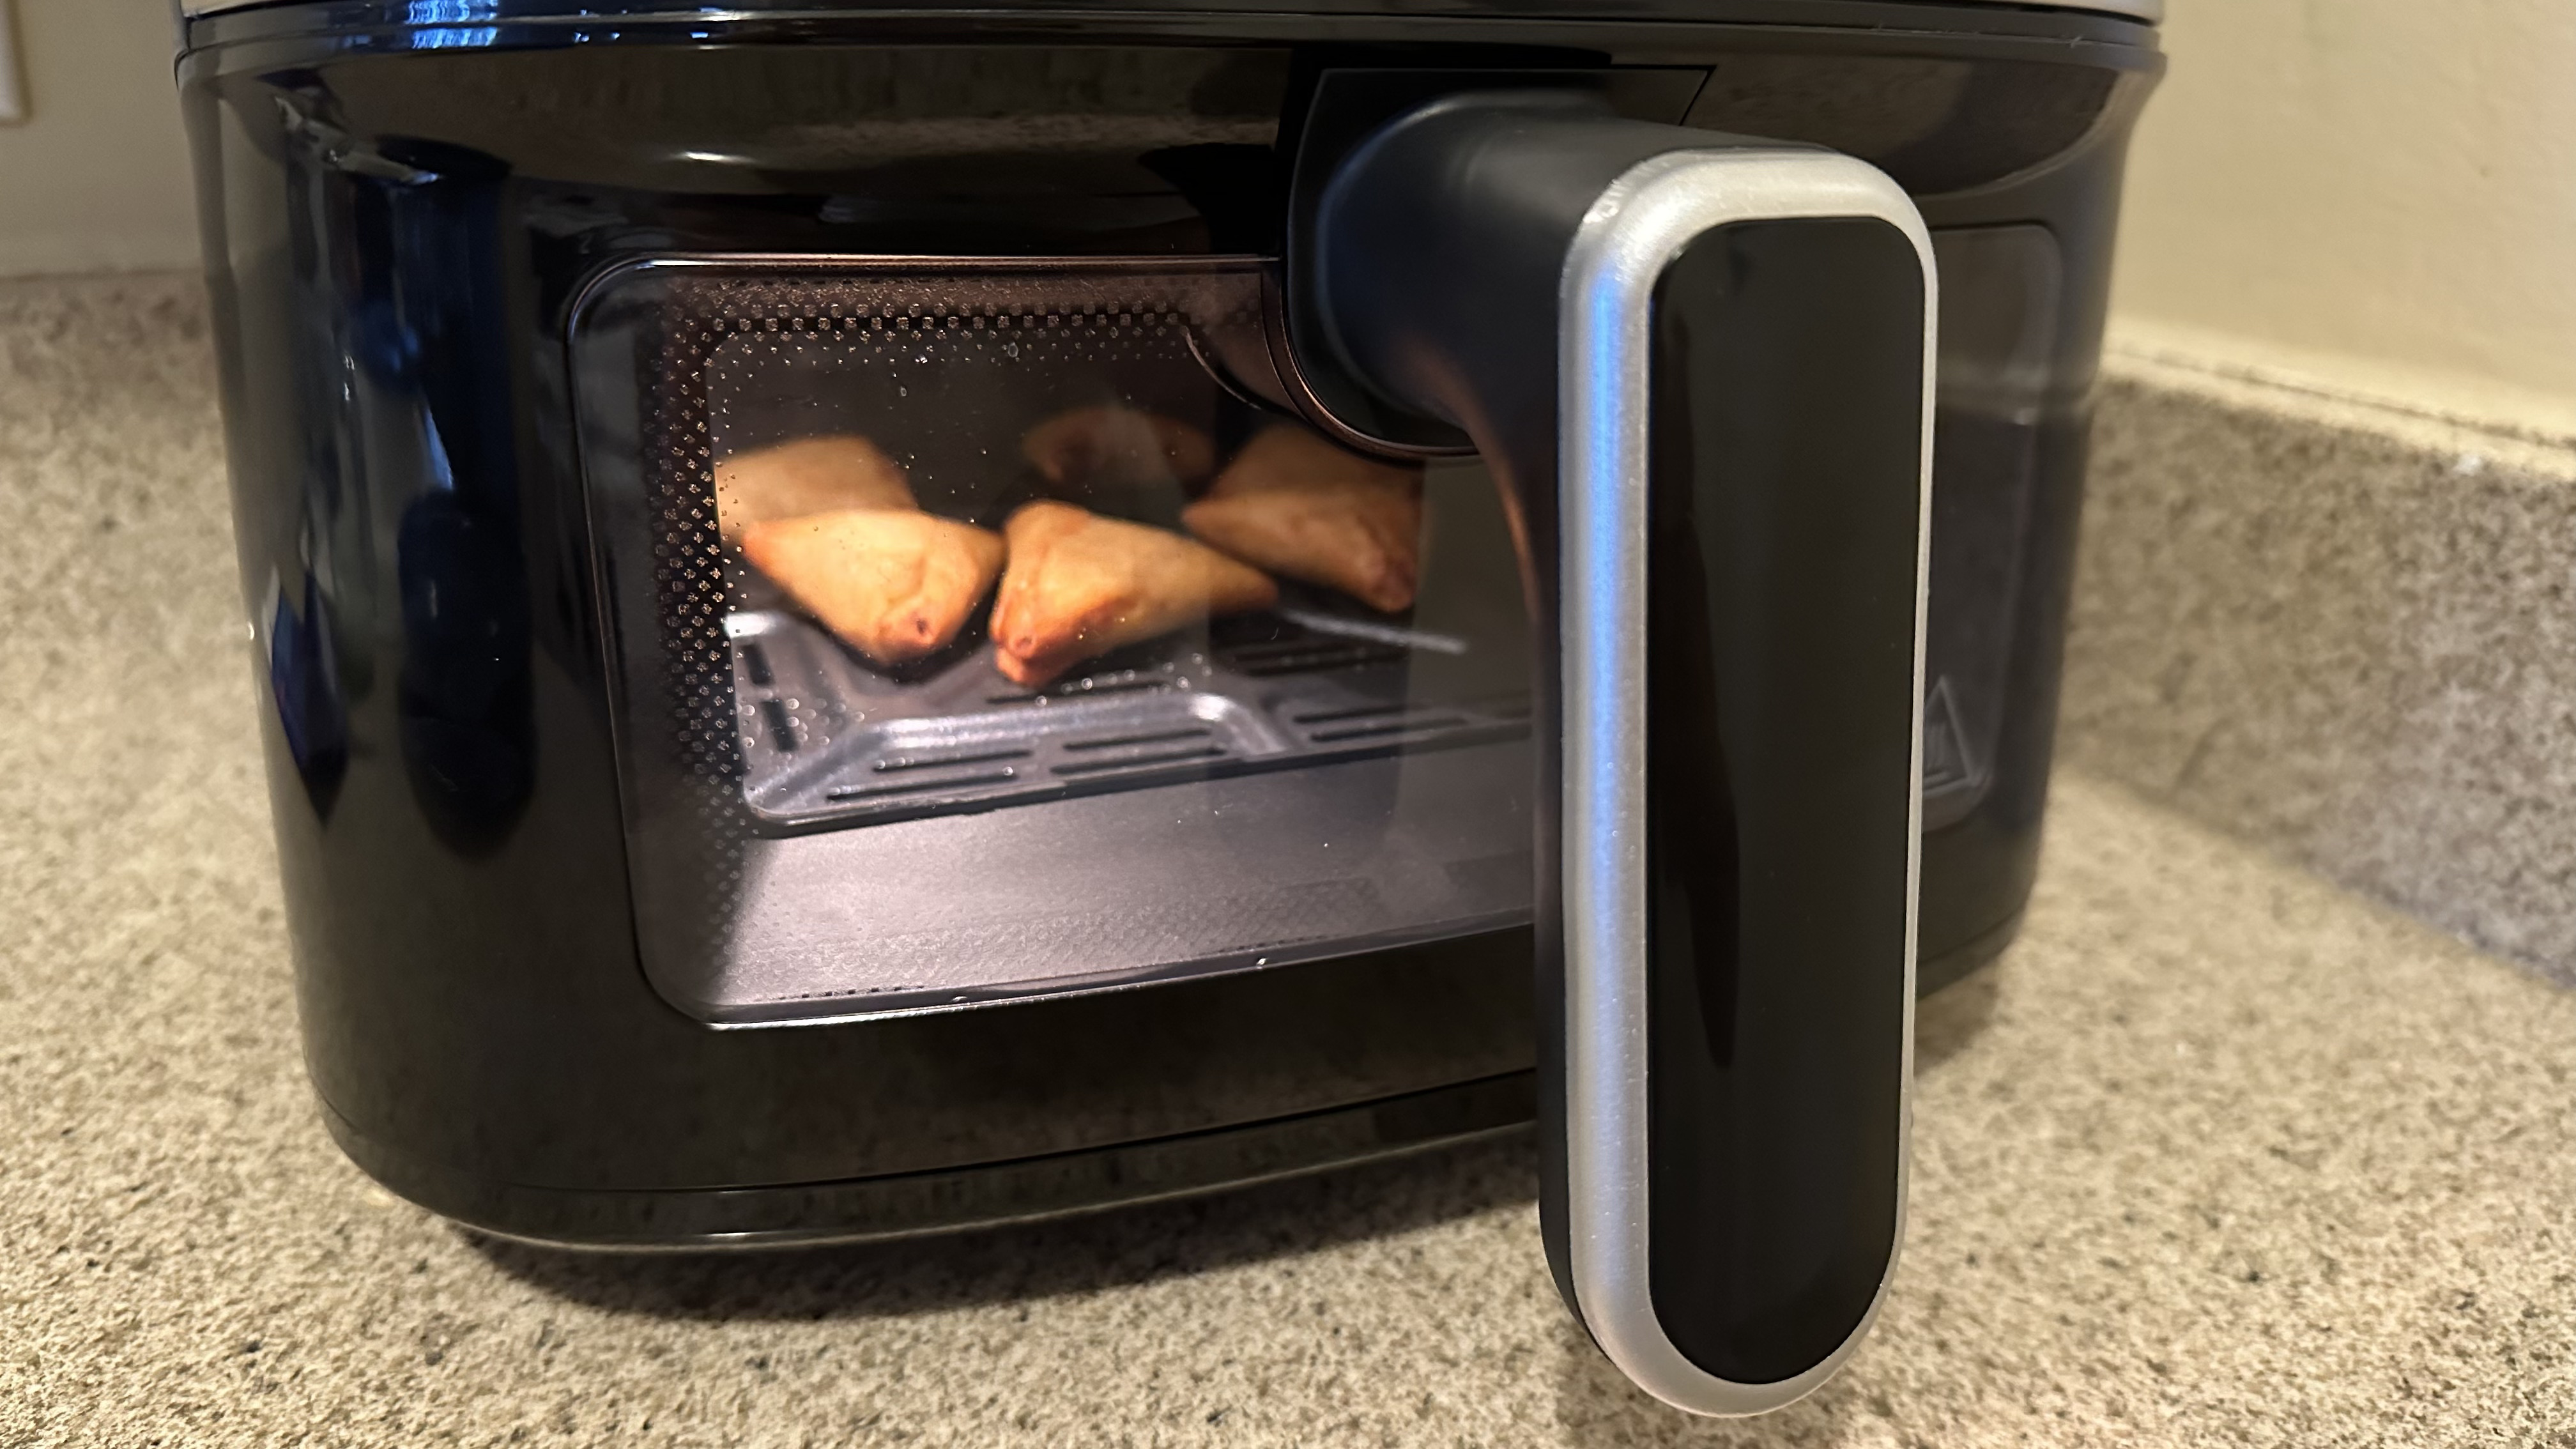
As for that basket, it’s decent sized at six quarts with a 9 x 9-inch base. You can even roast an entire chicken in it. The basket is made primarily of metal with a nonstick surface throughout. A crisper plate comes with the device and must always be inserted for cooking. It’s made of the same material as the basket with a nonstick surface. Unfortunately, you don’t get racks to stack food. On the outside of the basket is a large, cool touch handle that makes it easy to pull the basket in and out of the air fryer. Both the basket and crisper plate are dishwasher safe for easy cleaning.
Cuisinart Basket Air-200: Performance
I used the Cuisinart Basket Air Fryer Air-200 over two weeks, multiple times per day, seeing how the appliance held up overall, alongside testing the various cooking functions and presets performed. Beyond cooking more basic frozen snacks, I prepared full meals in the machine and made some of the recipes in the instruction booklet.
My first test was its ability to cook fresh veggies, and I chose summer squash, tomato, and onion that I lightly coated with olive oil and seasoning. I made the veggies in three different shifts to try out the air fry and roast cooking functions along with the vegetables preset.
Using a recipe online, I started with the air fry setting at 375°F and set the timer for 15 minutes. Whenever you air fry, the machine is automatically set to 450°F and 20 minutes, and the buttons on either side of the display make it simple to change those settings. You don’t need to preheat. That’s only necessary for the bake and broil settings. A toss reminder goes off halfway through the cooking. However, in actual testing, that toss reminder seemed to go off later than halfway through cooking. You’ll know it’s time to toss when you hear loud, obnoxious beeps and the indicator light flashes. It’s possible to deselect the toss reminder if you don’t want it on.
During the 15 minutes of air frying, I occasionally checked on the veggies through the viewing window and tossed them when the toss reminder went off. The device immediately went back to cooking as soon as I put the basket back in place, though I’ve noticed the food slightly shifts in the basket every time it’s inserted due to the force of sliding in the basket.
A beep goes off again when the timer is finished, and the device will automatically enter a keep warm mode after one minute. You’ll know it’s on keep warm as a blue light illuminates above the button. It shuts off when you remove the basket, press the stop/start button, or 60 minutes have passed. I tested this function with several foods, and they remained lukewarm during that time but not hot like when fresh out of the air fryer.
As for the air-fried veggies, they turned out lightly browned, with the onion getting slightly crisp after the exact amount of recommended time. They were perfectly cooked and also didn’t stick to the crisper plate. Unfortunately, the removable crisper plate didn’t stay in place as I dumped the veggies onto a plate, which could be a massive burn hazard.
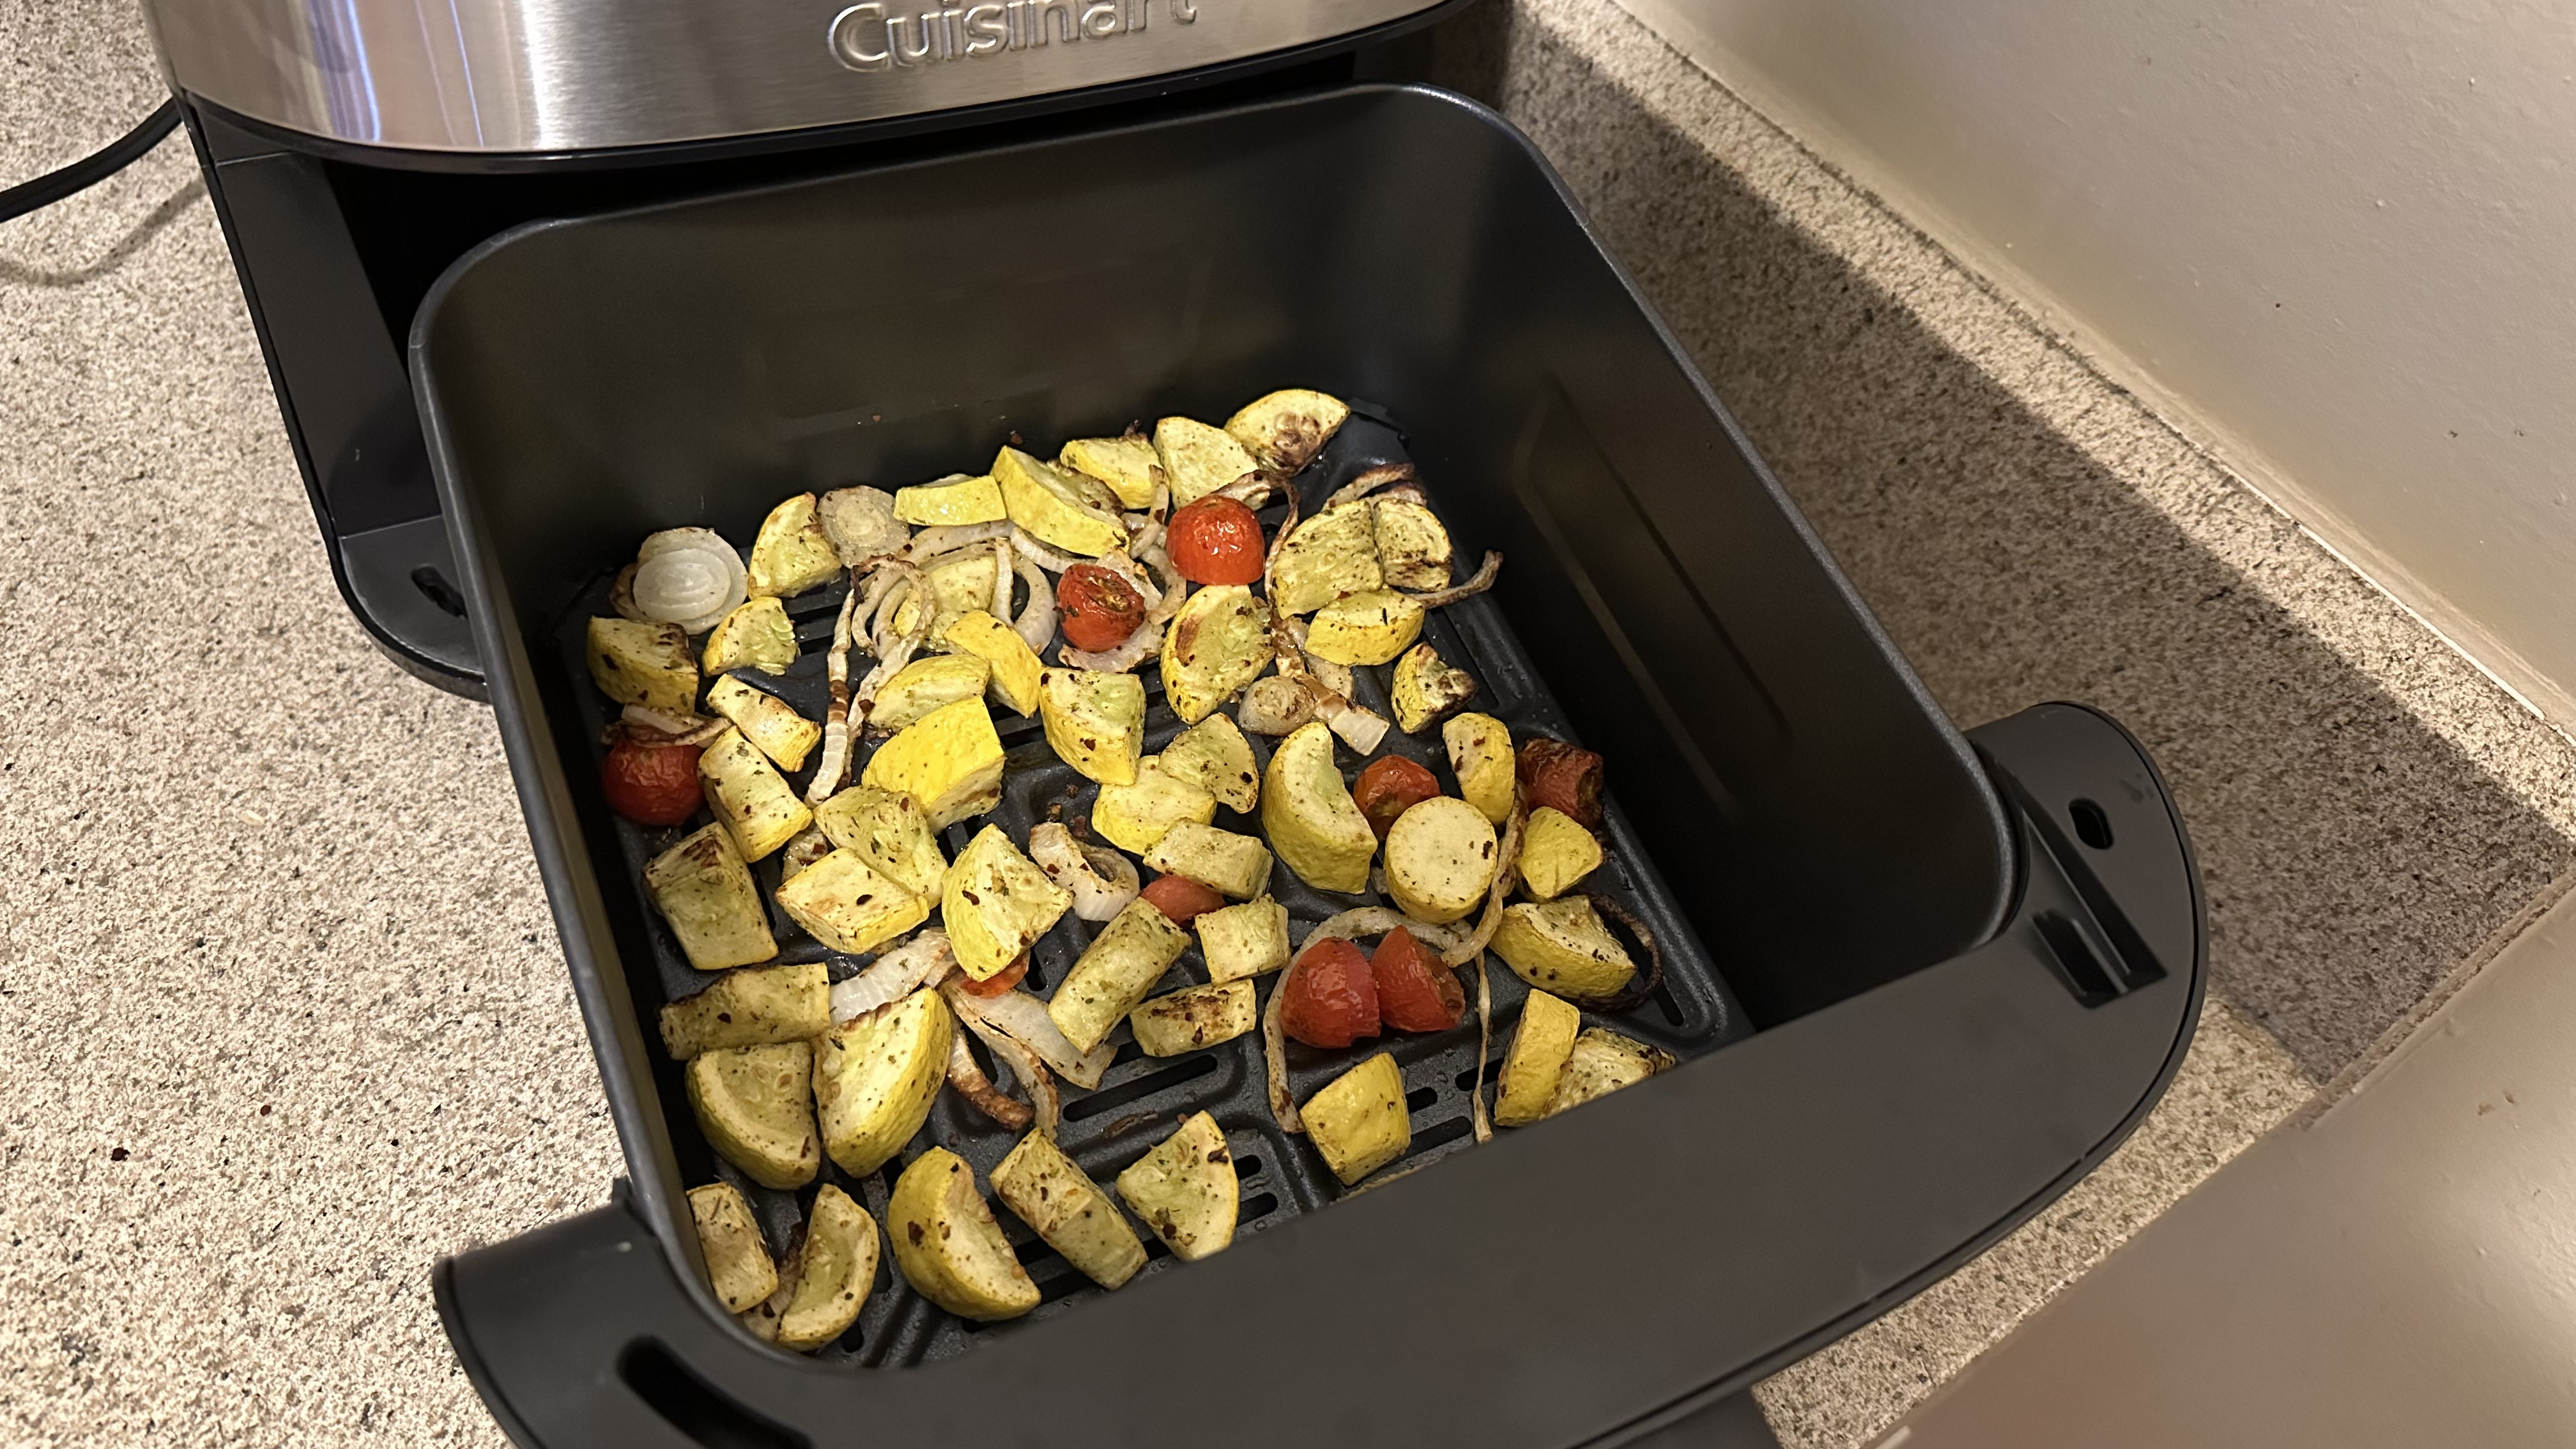
I tested the roast function using the same temperature and time with the same results. Next came the veggie preset, which automatically set the machine to cook at 350°F for 10 mins. I adjusted the time and temperature to match the others and had similar results. None of the different settings I tried while cooking the veggies showed any noticeable difference.
I also made frozen chicken breast using the air fry and bake functions. The instruction book lists cooking functions, times, and temperatures for certain foods, but frozen chicken breast wasn’t on the list, so I looked up another recipe online. When air frying, the chicken was lightly browned and fully cooked after 20 mins at 350°F, while baking took slightly longer to get those results. I had to preheat the machine before baking, and that took about two minutes, still much quicker than an oven. However, the results didn’t appear any different from air frying.
To complete my air fryer meal, I made fresh potato chips, following another recipe online. I only used the air fry setting when cooking the potatoes, and the results weren’t as great as I’d hoped. The chips didn't appear to get evenly cooked. Some of that was due to my inability to slice the potatoes, but the cooking time and temperature were still way off. This was the only time the Cuisinart Basket Air Fryer really let me down.
I made turkey bacon in the air fryer, using the recommended time and temperature in the instruction book. I found it slightly undercooked and not crispy with these settings, granted those recommendations were for regular bacon. I cooked it a little longer and had better results. The air fryer was much quicker and easier to use than a pan on the stove.
The final cooking function that I tested was broiling while making turkey burgers. The cooking chart in the instruction booklet recommends using that setting when making burgers. I did notice the top of my burgers getting browner than the bottom, which means this function actually cooks your food differently than other settings.
Beyond the cooking chart in the instruction book, there’s a pretty hefty recipe section, so I decided to give two of them a try. Many of the recipes were a bit too complicated for my liking. You can even stick an 8 x 8-inch pan in the basket and bake different sweet treats, should you desire.
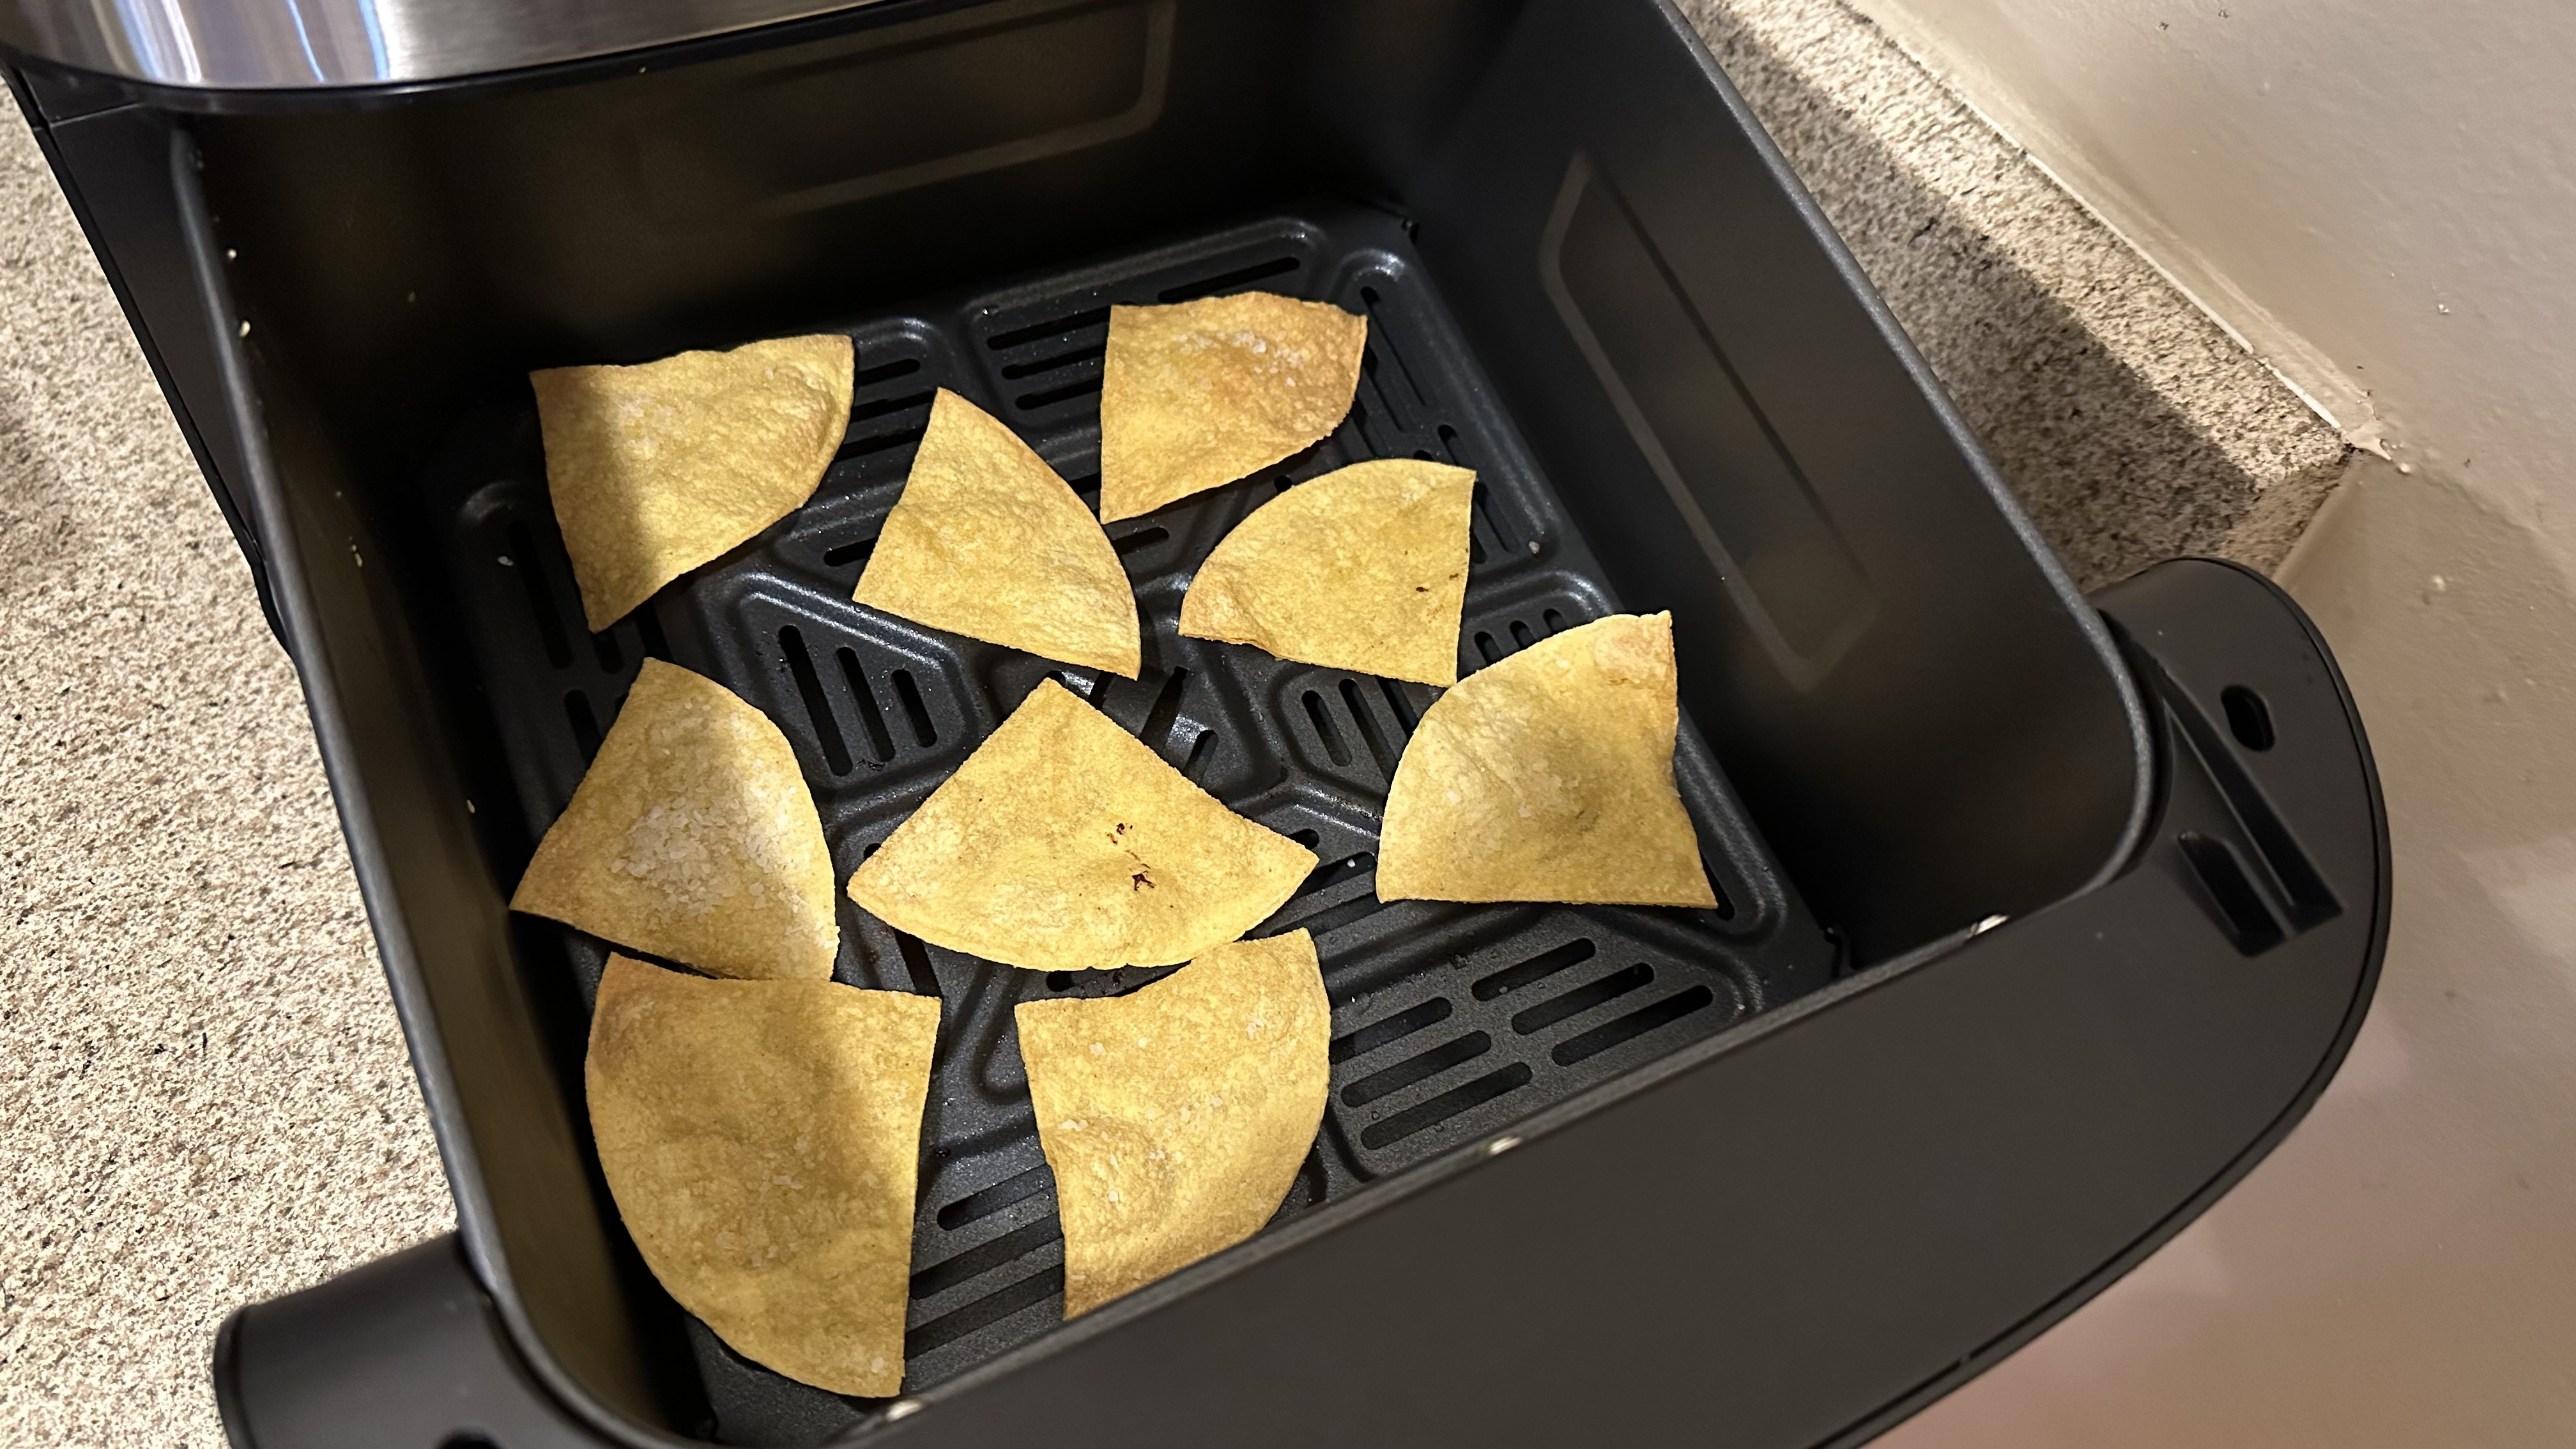
My first recipe attempt was the lime tortilla chips. The recipe was easy to follow but had several flaws. It mentions cooking the tortillas in two batches. In reality, it’ll be four if you plan on only doing a single layer on the basket, as instructed. I also found the cooking time slightly short, leaving the chips a bit soggy. I also made Raspberry Peach Hand Pies from the instruction booklet with some modifications. The cooking time and temperature were spot on, and the results were delicious. It’s definitely a recipe that I’d make again.
There are a few other Air Fry presets that I also tried. The first one was the French Fries button. Unfortunately, my frozen fries were burned at the 18-minute, 450°F standard setting. I tried cooking at lower settings with better results. The fries were crisp and cooked quicker and more evenly than in the oven. That seemed to be the case with all the frozen snacks I made in the air fryer, including samosas, turkey meatballs, and mozzarella sticks. At first, I used the frozen snacks preset when making the samosas and mozzarella sticks, and the snacks were undercooked. Just be sure to use tongs to get your snacks out, as it’s easy to burn yourself on the edges of the air fryer basket when using your hands, and as I mentioned, the crisper plate falls out if you try to dump it.
One preset that worked great was the leftovers. It cooks your food at 350°F for 10 minutes, and I used it to warm up my leftover chicken and vegetables. They ended up perfectly done and not burned at all. I had the same results when I warmed up a hand pie.
Overall, the Cuisinart Basket Air Fryer did a great job cooking my food. I loved the convenience of pretty much just throwing my food in and having it ready to go minutes later with minimal effort on my part. It’s also extra nice in the summer, as I don’t need to turn on the oven, which adds a ton of heat to my already hot home. The air fryer does expel heat and stays warm for a long while after cooking, but it’s nowhere near the level of an oven. It’s also quiet, averaging about 55 to 60dB in use, though the indicator beeping is loud.
However, most cooking functions and presets didn’t do much to make my life easier, make any of my food better, or deliver substantially different results from one setting to the next. It’s similar to those microwave settings that people rarely use. With that said, I appreciated the keep warm and leftover buttons, as they were easy to use and served a purpose.
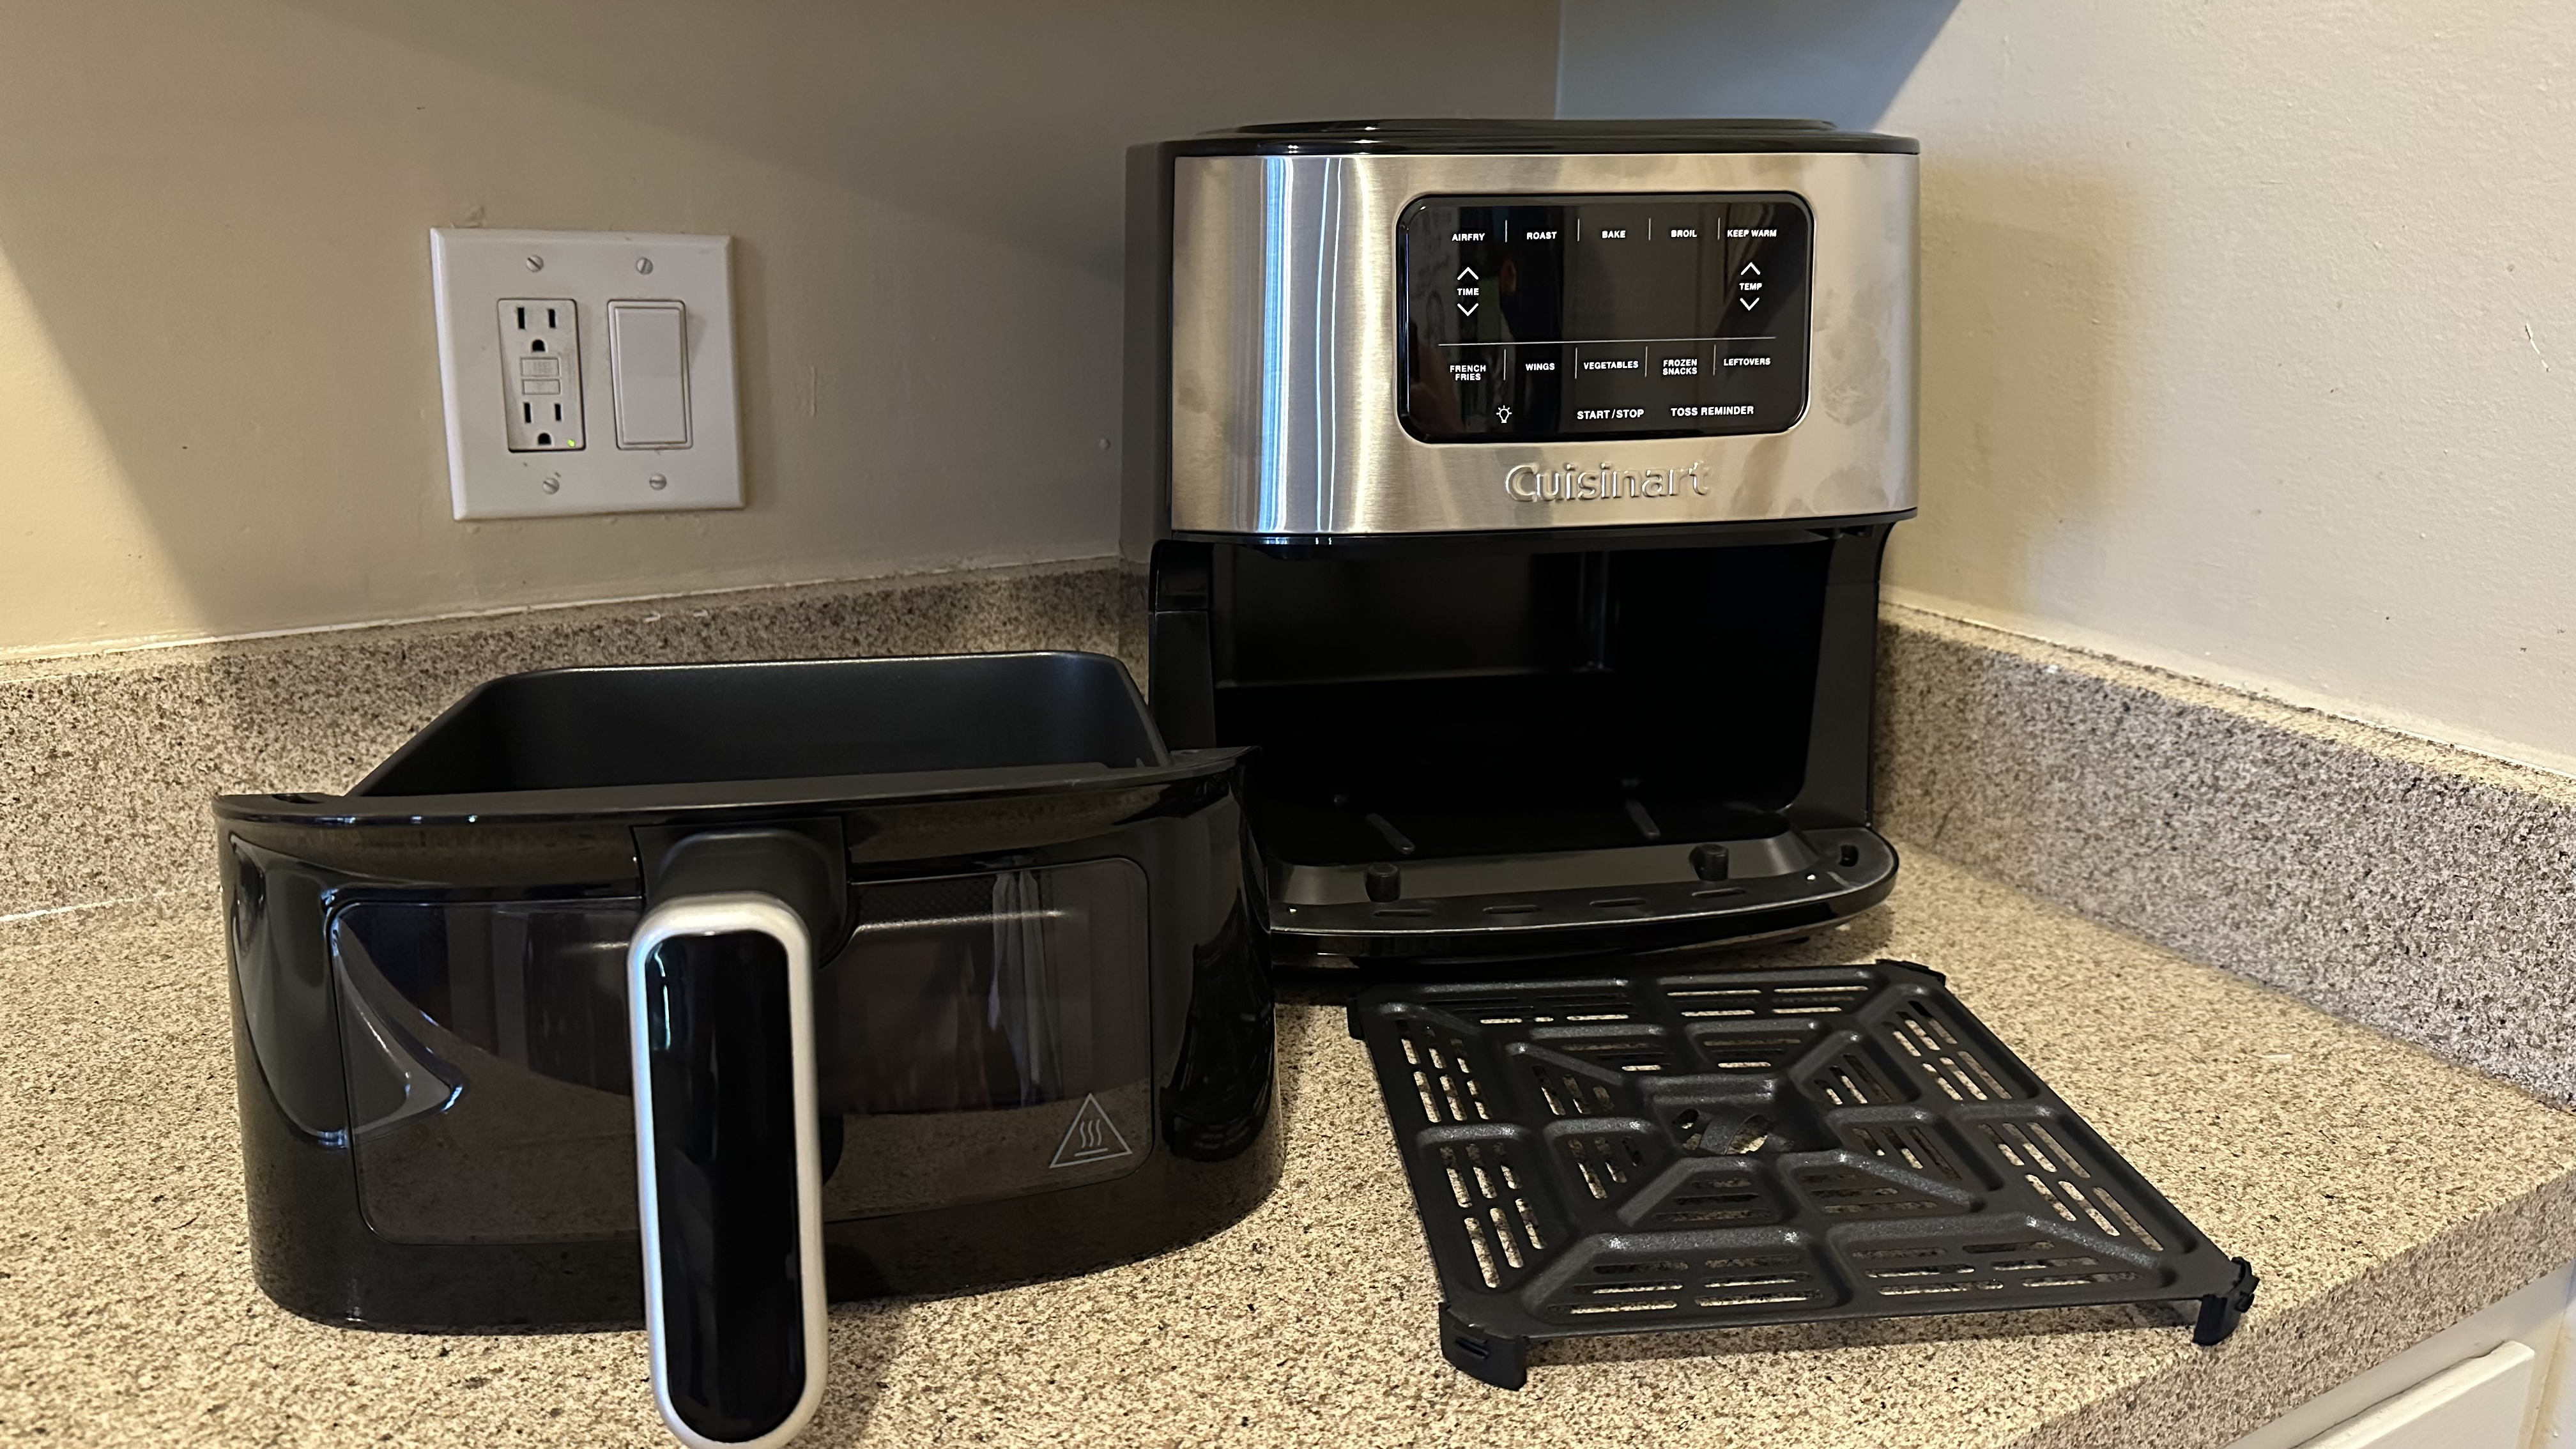
When it’s time to clean the air fryer, you can wipe down the actual machine with a damp cloth and mild soap. You’ll probably notice food residue on the crisper plate and droppings in the basket. Luckily, it's so simple to wash, especially if you have a dishwasher, because both the basket and crisper plate are dishwasher safe.
Buying Guides
Best small air fryers for one person 2024: our top compact air fryers, tested by experts
Reviews
Midea MAD53109APK 5.5QT Air Fryer review: a small, simple, and highly effective option
Toshiba AF-74CSROUS 7.7-Quart Air Fryer review: a smart and roomy air fryer
Hamilton Beach 11.6qt Digital Hot Air Fryer review: quickly and evenly cook your favorite foods
Typhur Dome AF03 Air Fryer review: a countertop air fryer capable of cooking a 12-inch pizza
But if you’re like me and don’t have a dishwasher, I’d compare cleaning the basket to cleaning a large pot. Cuisinart recommends you don’t use harsh abrasives or corrosive products, so I just used a dish wand and some dish soap. The food stuck on the crisper plate, and basket comes off with little effort. After extensive use over the past two weeks, I have to say the Cuisinart Basket Air Fryer looks as good as new. Even the food viewing window is still in great shape.
Cuisinart Basket Air-200: User reviews
Customers on Amazon are highly satisfied with the air fryer, praising its quality, appearance, and size. They appreciate that it cooks food evenly and adds an elegant touch to their kitchen. The quiet operation of the air fryer is another plus point, with users noting that the reminder buzzer is not harsh on the ears.
Users find the air fryer easy to use, efficient, and capable of generating the right amount of heat for cooking. They also appreciate that it has minimal odor compared to other air fryers, which can have a plastic smell.
The air fryer is also highly versatile, with users noting that it has multiple settings and can be used to prepare a range of recipes. However, some users have reported occasional issues with the temperature and timing buttons not responding and the fryer shutting down in the middle of a program.
Should you buy the Cuisinart Basket Air-200?
| Attribute | Notes | Rating |
|---|---|---|
| Capacity | suitable for cooking meals for a family; can fit a whole chicken; bulky size may not be ideal for kitchens with limited counter space | 8/10 |
| Wattage and Cooking Performance | can cook food at temperatures up to 450°F; keep warm mode; delivers hot, evenly cooked, and crispy results; some presets may require adjustments | 8/10 |
| Versatility and Cooking Functions | multiple cooking functions and presets, including air fry, roast, and broil; keep warm and leftovers functions; some presets may not significantly enhance cooking results | 7/10 |
| Ease of Cleaning | non-stick basket and crisper plate that are dishwasher safe; viewing window remains in good condition after extensive use | 9/10 |
| Build Quality and Safety Features | solid, with a black plastic and stainless steel design; large, cool-touch handle; crisper plate can pose a burn hazard if it falls out; quiet during operation but indicator beeping is loud | 8/10 |
Buy it if...
You want crisp, perfectly browned food.
This air fryer creates some delicious dishes without the need for excess oil, helping keep your meals healthier as well.
You want easy clean up after cooking.
The air fryer basket and crisper plate are dishwasher safe, and even if you don’t have a dishwasher, the food remnants come easily off the non-stick surfaces.
You want to check on your food as it’s cooking.
There’s a window and oven light available on the air fryer to ensure food is not burning without interrupting the cooking process.
Don’t buy it if…
You want the most budget-friendly air fryer
There are a variety of air fryers available for far less than the $149.95 price tag.
You expect the presets and cooking functions to work perfectly
In testing, I didn’t notice much of a difference in results when using the different cooking functions, while many of the presets either overcooked or undercooked the food.
You’re tight on space
The Cuisinart Basket Air Fryer is not the most compact option, so it’ll take up a good portion of your counter. Luckily, it’s not too heavy, so moving it for storage isn’t a big deal.
How does the Cuisinart Basket Air-200 compare?
The Cuisinart Basket Air Fryer gets a lot right. However, maybe you’re looking for extra features, a smaller form factor, or a cheaper price. One air fryer option, which I mentioned earlier, does all of that—the Cuisinart Compact Air Fryer Toaster. Beyond traditional air frying, you can use this device like a toaster oven, and it’s more compact to fit better in smaller spaces, though that does mean you have a smaller cooking area. You’ll also lose the handy LCD panel and easy-to-press buttons. Instead, you just get dials, but the $129.95 price tag will save you some money.
If you want a little more cooking space for a similar $150 cost, the GoWISE GW22956 Air Fryer can deliver, as it’s seven quarts versus the Cuisinart Basket Air Fryer’s six quarts. You also get stackable racks, making it possible to layer foods to cook more at once. But you won’t get the handy viewing window in this model, and the basket isn’t fully removable, making clean-up more of a hassle.
For an ultra cheaper and compact alternative, the Philips XXL HD9630/98 Air Fryer is the way to go. It’ll set you back less than $100 and offers a smaller four-quart basket and footprint to fit better in tighter spaces. This air fryer is basic but easy to use, so you won’t get a large LCD panel, viewing window, or the presets/cooking functions available with Cuisinart Basket Air Fryer.
How I tested the Cuisinart Basket Air Fryer Air-200
I used the Cuisinart Basket Air Fryer for two weeks, making something in it multiple times per day. During that time, I tested almost all of its cooking functions and presets to see how each performed using a variety of foods, both frozen and fresh. Its instruction booklet also features a cooking chart and recipes, so I made sure to see how they stacked up. After, I would always clean the device to discern how easy the process was.
See more about how we test.

Danielle Abraham, a Public Relations and Advertising graduate from the Rochester Institute of Technology, specializes in reviewing robot vacuums and coffee makers for Top Ten Reviews. Her work has been featured in top publications like IGN and TechRadar. She enjoys reading, watching documentaries, and hiking in Los Angeles and New York in her free time.
